|
| EI4LF | Primers | HAM Radio Workstation on Raspberry Pi 400 |
Welcome to the EI4LF amateur radio page |
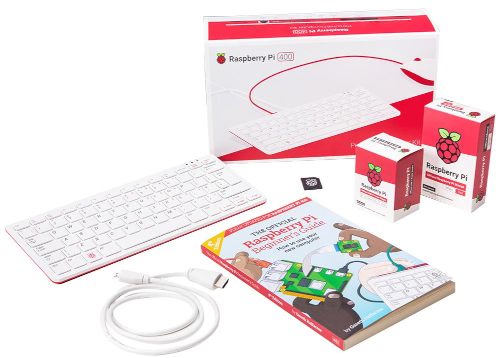
HAM Radio Shack Workstation built on a Raspberry Pi 4001. Introduction
For a Raspberry Pi Deskop I wanted to get the right mix of usability but also lightweight considering the hardware platform. Raspberry Pi Operating System (OS) is OK out of the box and for doing projects where interaction with the desktop is not that often. I choose to use Ubuntu; however, the GNOME3 based desktop requires to much resources. The lowest resource desktop is Xfce; however, the MATE Desktop is also pretty lightweight, is much more functional and feature rich. MATE is the continuation of the old GNOME2 environment that provides an intuitive and attractive desktop environment that is extremely lean, stable, and has decent customisation. Ubuntu MATE is therefore a good balance of lightweight with software availability for HAM radio. What you’ll need:
2. Ubuntu MATE
Ref: Ubuntu MATE From the Ubuntu MATE website download the Raspberry Pi 64-bit image, compatible with Raspberry Pi models: B3, B3+, B4 and 400. The downloaded image at the time of writing is ubuntu-mate-22.04-desktop-arm64+raspi.img.xz. 3. Raspberry Pi3.1. Using the Raspberry Pi imagerFrom the Raspberry Pi Software Centre download and install the latest version of The Raspberry Pi imager. ~$ ls ~/Downloads imager_1.7.5_amd64.deb Install and then run the Raspberry Pi imager. In this example it is carried out on a GNU/Linux OS. ~$ sudo apt install rpi-imager ~$ rpi-imager
Select:
Accept message to erase data from the ''Internal SD card reader'. Raspberry Pi OS (64-bit) is written to the microSD card. 3.2. Manually imaging the file (Linux instruction)If you run into any difficulties, for example the verify part fails, then it is possible to manually install the image on the MicroSD card.
Before plugging the MicroSD card into the computer for imaging run ~$ lsblk NAME MAJ:MIN RM SIZE RO TYPE MOUNTPOINTS nvme0n1 259:0 0 1.9T 0 disk ├─nvme0n1p1 259:1 0 512M 0 part /boot/efi └─nvme0n1p2 259:2 0 1.9T 0 part /
Plug in the MicroSD card and rerun ~$ lsblk NAME MAJ:MIN RM SIZE RO TYPE MOUNTPOINTS mmcblk0 179:0 0 59.5G 0 disk nvme0n1 259:0 0 1.9T 0 disk ├─nvme0n1p1 259:1 0 512M 0 part /boot/efi └─nvme0n1p2 259:2 0 1.9T 0 part / Make sure the MicroSD card is not mounted. ~$ umount /dev/mmcblk0 umount: /dev/mmcblk0: not mounted
Uncompress the ~$ xz --decompress ubuntu-mate-22.04-desktop-arm64+raspi.img.xz
Using the ~$ sudo dd bs=1M of=/dev/mmcblk0 if=ubuntu-mate-22.04-desktop-arm64+raspi.img status=progress 4917821440 bytes (4.9 GB, 4.6 GiB) copied, 2 s, 2.5 GB/s 6333+0 records in 6333+0 records out 6640631808 bytes (6.6 GB, 6.2 GiB) copied, 150.709 s, 44.1 MB/s 4. Install the OS on the Raspberry PiInstall the newly created microSD card in the Raspberry Pi 400 and boot it. In this case (unlike the installation of Raspberry Pi OS), the Ubuntu MATE is not yet installed. When the file on the MicroSD card runs for the first time it will go through an install process. Follow the instruction and set as appropriate for your shack.
4.1. Pin MATE Terminal and Caja to top barSelect Menu => System Tools => MATE Terminal
Select Menu => System Tools => Caja
4.2. Update and Upgrade the OSUpdate and Upgrade the OS. This can be achieved via the: Menu => Administration => Software Updater or it can be carried out manually as follows: pi@ei4lf:~ $ sudo apt update && sudo apt upgrade [sudo] password for pi: raspberrypi Do you want to continue? [Y/n] Y Note: This process will take some time the first time it is performed. Remove any unnecessary packages. pi@ei4lf:~ $ sudo apt autoremove Do you want to continue? [Y/n] Y Review the instalation thus far.
pi@ei4lf:~ $ neofetch
           `:+shmNNMMNNmhs+:`              pi@EI4LF
        .odMMMMMMMMMMMMMMMMMMdo.           --------
      /dMMMMMMMMMMMMMMMmMMMMMMMMd/         OS: Ubuntu MATE 22.04.2 LTS aarch64
    :mMMMMMMMMMMMMNNNNM/`/yNMMMMMMm:       Host: Raspberry Pi 400 Rev 1.0
  `yMMMMMMMMMms:..-::oM:    -omMMMMMy`     Kernel: 5.15.0-1011-raspi
 `dMMMMMMMMy-.odNMMMMMM:    -odMMMMMMd`    Uptime: 9 hours, 11 mins
 hMMMMMMMm-.hMMy/....+M:`/yNm+mMMMMMMMh    Packages: 2130 (dpkg), 13 (snap)
/MMMMNmMN-:NMy`-yNMMMMMmNyyMN:`dMMMMMMM/   Shell: bash 5.1.16
hMMMMm -odMMh`sMMMMMMMMMMs sMN..MMMMMMMh   Resolution: 1280x1024
NMMMMm    `/yNMMMMMMMMMMMM: MM+ mMMMMMMN   DE: MATE 1.26.0
NMMMMm    `/yNMMMMMMMMMMMM: MM+ mMMMMMMN   WM: Metacity (Marco)
hMMMMm -odMMh sMMMMMMMMMMs oMN..MMMMMMMh   Theme: Yaru-MATE-light [GTK2/3]
/MMMMNNMN-:NMy`-yNMMMMMNNsyMN:`dMMMMMMM/   Icons: Yaru-MATE-light [GTK2/3]
 hMMMMMMMm-.hMMy/....+M:.+hNd+mMMMMMMMh    Terminal: mate-terminal
 `dMMMMMMMMy-.odNMMMMMM:    :smMMMMMMd`    Terminal Font: Ubuntu Mono 13
   yMMMMMMMMMms/..-::oM:    .+dMMMMMy      CPU: BCM2835 (4) @ 1.800GHz
    :mMMMMMMMMMMMMNNNNM: :smMMMMMMm:       Memory: 785MiB / 3789MiB
      /dMMMMMMMMMMMMMMMdNMMMMMMMd/
        .odMMMMMMMMMMMMMMMMMMdo.
           `:+shmNNMMNNmhs+:`
5. Wallpapers
Put personal wallpapers in the directory: Right click on the desktop background:
6. Enable PlankPlank is a simple dock for GNU/Linux. Menu => Preferences => Startup Applications and select Add
7. Network Time ProtocolEnable Network Time Protocol (NTP) to get exact time updates from the Internet NTP servers. Install NTP. pi@ei4lf:~ $ sudo apt install systemd-timesyncd pi@ei4lf:~ $ sudo timedatectl set-ntp true Confirm the time. pi@ei4lf:~ $ date Thu 20 Jul 2023 10:48:29 IST 8. HAM Radio packagesInstall the HAM Radio packages. pi@ei4lf:~ $ sudo apt install hamradio-* Do you want to continue? [Y/n] Y
Note: Again, this install will take some time. Have a cup of coffee while it does it.
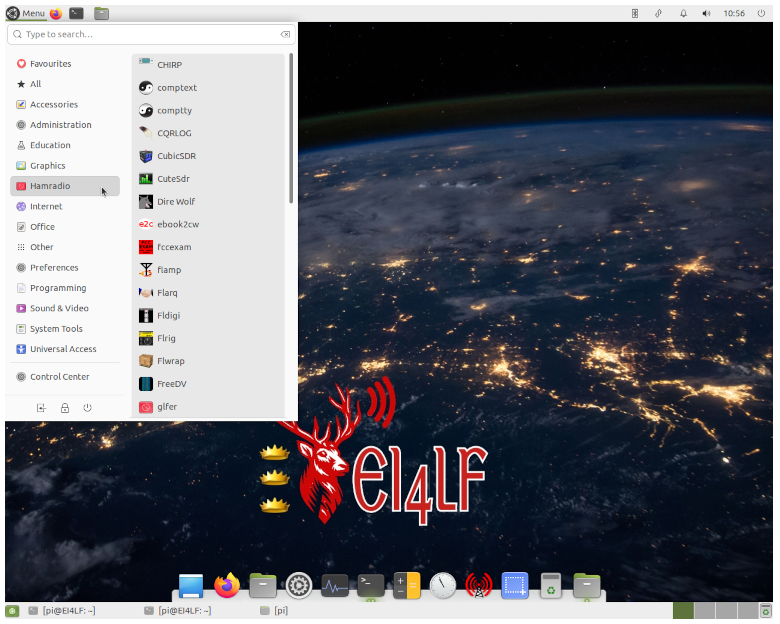
An error will show regarding the 9. Adjusting Menus
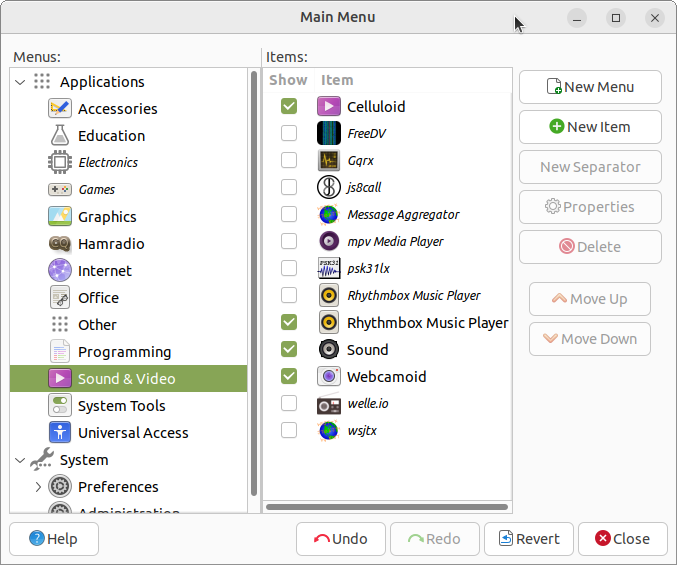
Unfortunately some of the applications in the HamRadio packages are classified under multiple categories. For example Menu => Preferences => Main Menu
Disable HamRadio menu items in the Sound & Video category by unchecking them.
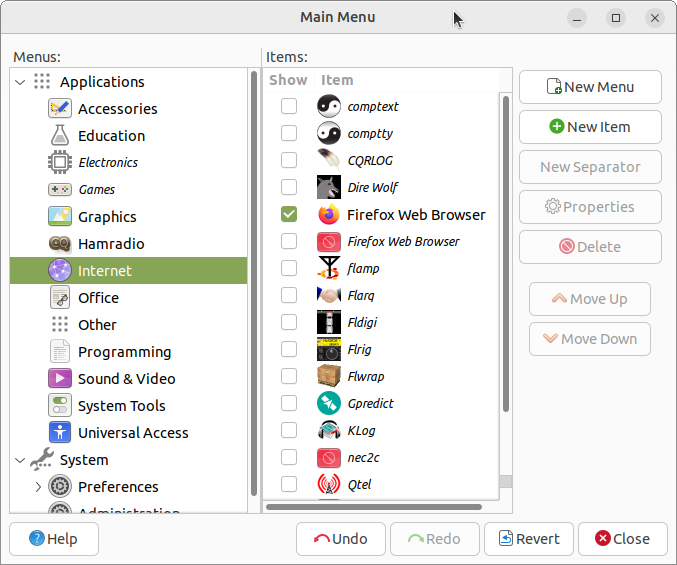
Disable HamRadio menu items in the Internet category by unchecking them.
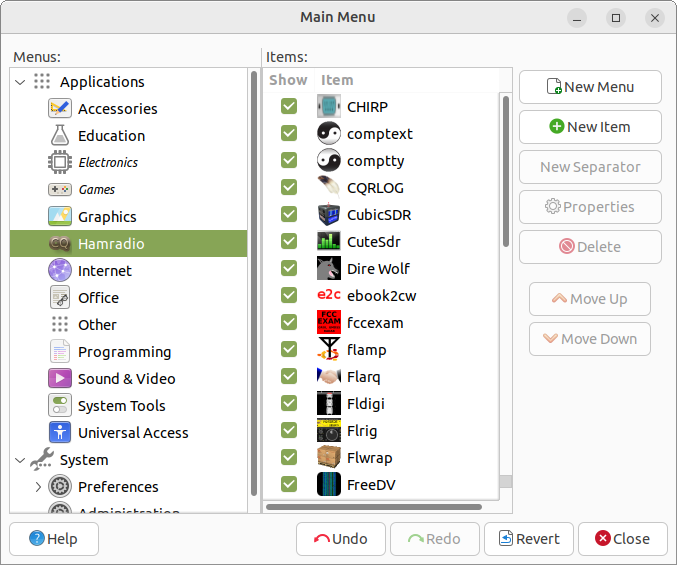
View of the completed HamRadio category. 10. Final Desktop
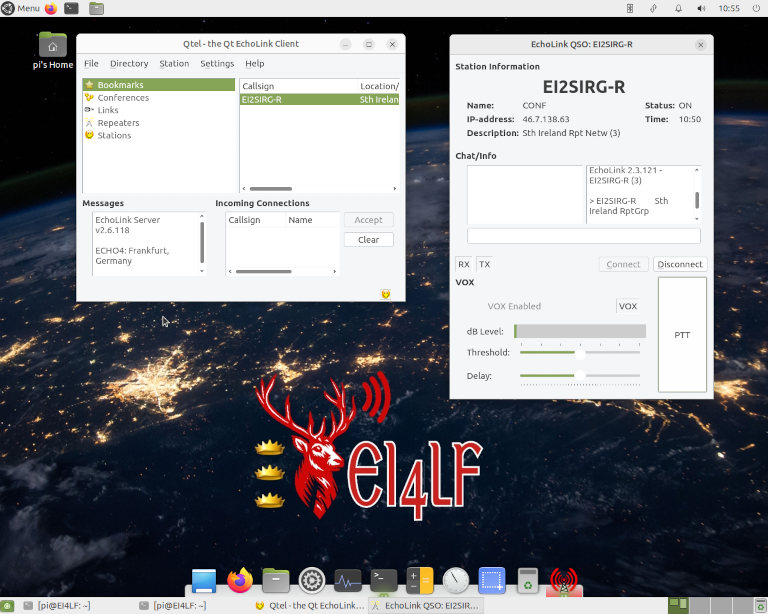
View of the working Desktop with the HamRadio category from the Menu 11. Example application - QTelQTel is an EchoLink client built using the QT graphical framework. Here shown QTel connected to the Southern Ireland Repeater Network.
|
  |
Copyright © 2026 C²S Consulting |