|
| EI4LF | Primers | QRPLabs QMX - Digi Modes |
Welcome to the EI4LF amateur radio page |
QRPLabs QMX Digi-modes setupThis primer illustrates how to setup Digi-modes with a GNU/Linux computer using the WSJT-X Software. 1. GNU/Linux Modem Manager and Braille ServicesOpen a terminal on the GNU/Linux computer and insure that the Modem Manager and Braille Services are stopped. Stop the ModemManager ~$ sudo systemctl stop ModemManager ~$ sudo systemctl disable ModemManager ~$ sudo systemctl mask ModemManager Stop the Braille service for access by sight impaired people. ~$ sudo systemctl stop brltty-udev.service ~$ sudo systemctl disable brltty-udev.service ~$ sudo systemctl mask brltty-udev.service ~$ sudo systemctl stop brltty.service ~$ sudo systemctl disable brltty.service ~$ sudo systemctl mask brltty.service Connect QMX to GNU/Linux computer with a USB-USB cable and via the GNU/Linux terminal identify the devices created by the QMX. ~$ ls /dev/ttyACM* /dev/ttyACM0 2. Time Sync the computerA timesync either from a GPS receiver dongle of Network Time Protocol (NTP) server on the Internet is essential. Check this:
~$ timedatectl status
                     Local time: Sat 2026-08-22 13:47:37 IST
                 Universal time: Sat 2026-08-22 12:47:37 UTC
                       RTC time: Sat 2026-08-22 12:47:37
                      Time zone: Europe/Dublin (IST, +0100)
      System clock synchronized: yes
                    NTP service: active
                RTC in local TZ: no
Install Chronychrony is a versatile implementation of the NTP. It can synchronise the system clock with NTP servers, reference clocks (e.g. GPS receiver), and manual input using wristwatch and keyboard. It can also operate as an NTPv4 (RFC 5905) server and peer to provide a time service to other computers in the network. It is designed to perform well in a wide range of conditions, including intermittent network connections, heavily congested networks, changing temperatures (ordinary computer clocks are sensitive to temperature), and systems that do not run continuously, or run on a virtual machine. Typical accuracy between two machines synchronised over the Internet is within a few milliseconds; on a LAN, accuracy is typically in tens of microseconds. With hardware timestamping, or a hardware reference clock, sub-microsecond accuracy may be possible. Two programs are included in chrony, chronyd is a daemon that can be started at boot time and chronyc is a command-line interface program which can be used to monitor chronyd’s performance and to change various operating parameters whilst it is running. ~$sudo apt install chrony ~$ chronyc chronyc> tracking Reference ID : BC7D4006 (t1.time.ir2.yahoo.com) Stratum : 3 Ref time (UTC) : Sat Aug 22 12:58:48 2026 System time : 0.000698347 seconds slow of NTP time Last offset : -0.001973122 seconds RMS offset : 0.054172028 seconds Frequency : 6.949 ppm slow Residual freq : -7.095 ppm Skew : 1000000.000 ppm Root delay : 0.051457714 seconds Root dispersion : 16.224834442 seconds Update interval : 64.3 seconds Leap status : Normal This output indicates the clock is locked in and extremely accurate.
Install and setup WSJT-XThere are two configuration items to do on the WSJT-X software:
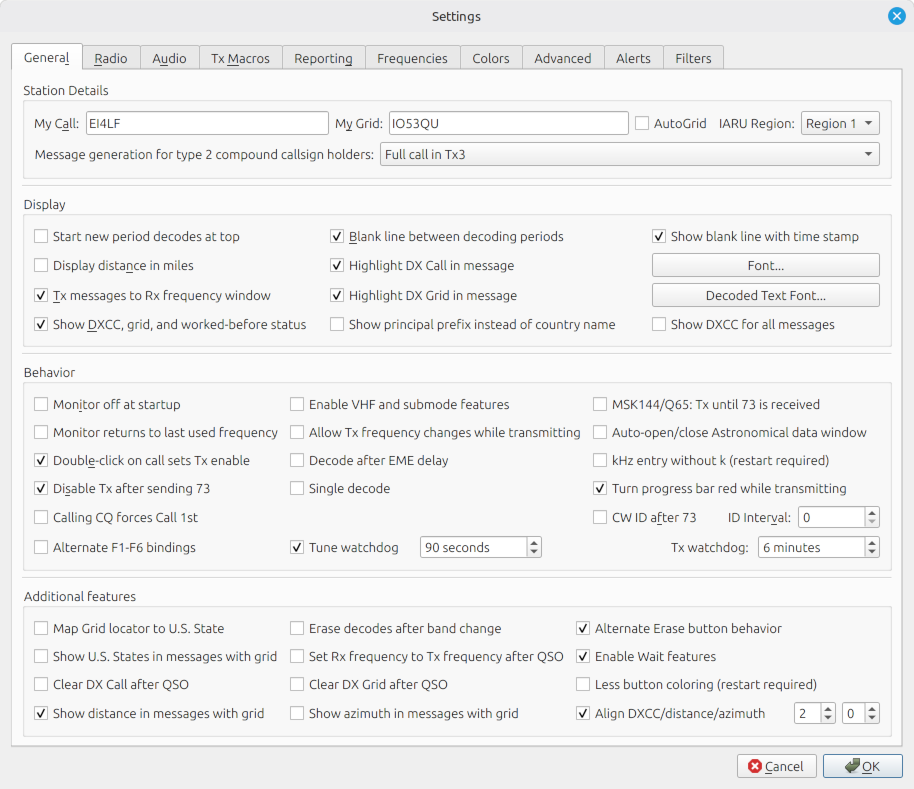
3. Setup the WSJT-X SoftwareRun WSJT-X File >> Settings >> General Tab
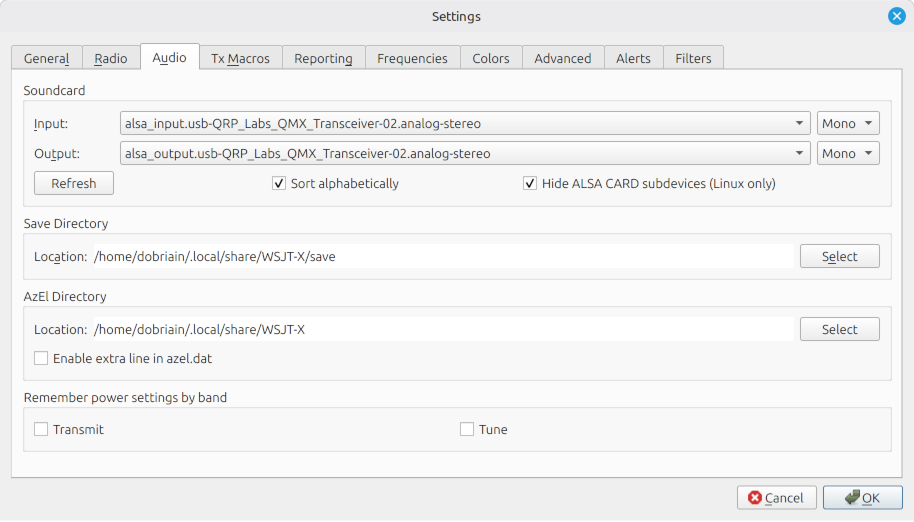
File >> Settings >> Audio Tab
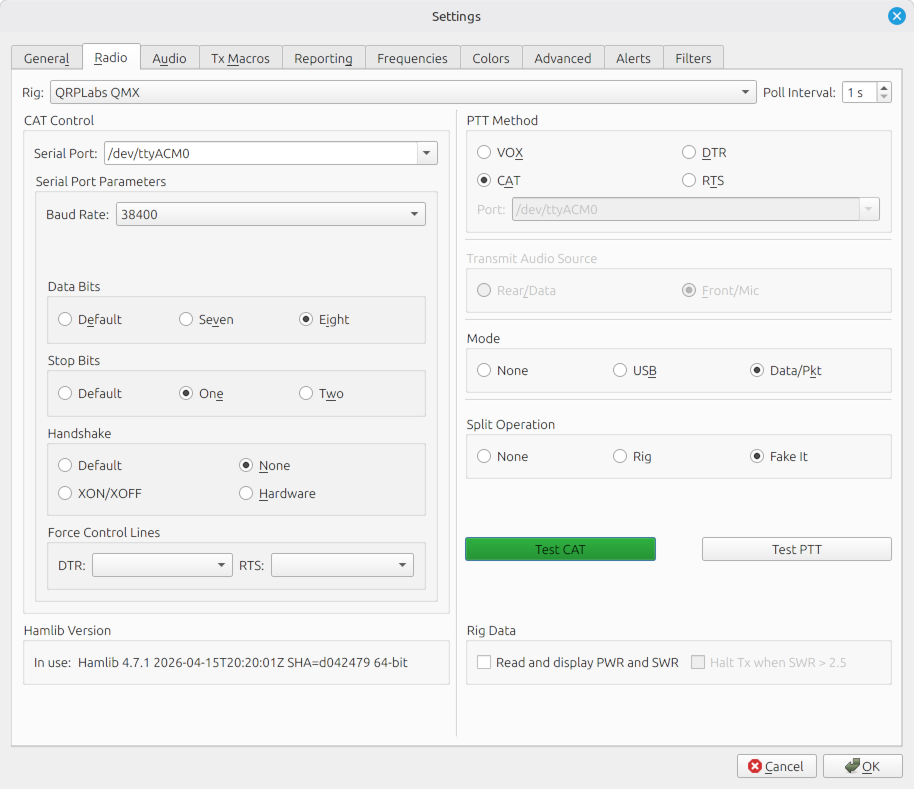
File >> Settings >> Radio Tab
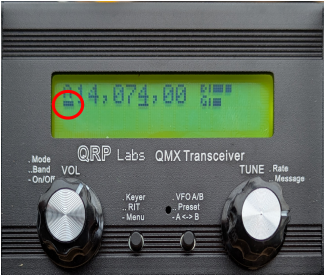
4. TX StatusSet the WSJT-X power slider to the maximum setting. Once the Transmissions are happening a Transmit Status indicator appears under the A to the left of the screen on the QMX.
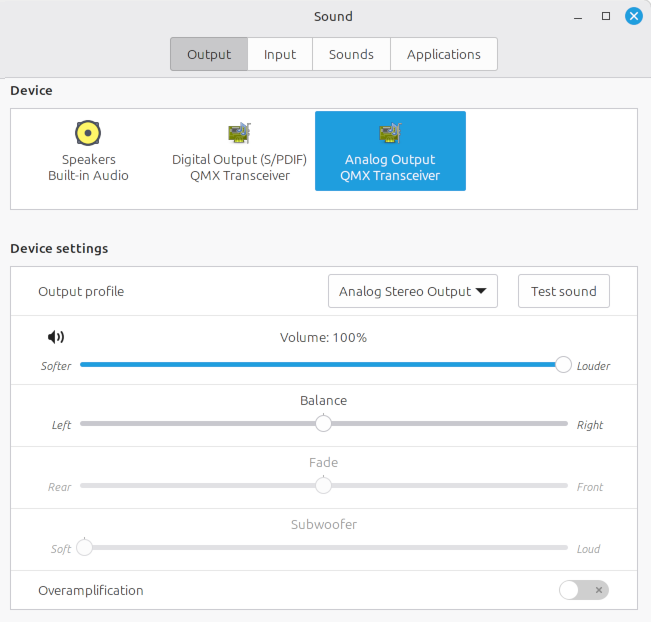
On the GNU/Linux computer adjust Audio Settings to 100% for the Analogue Output QMX Transciever.
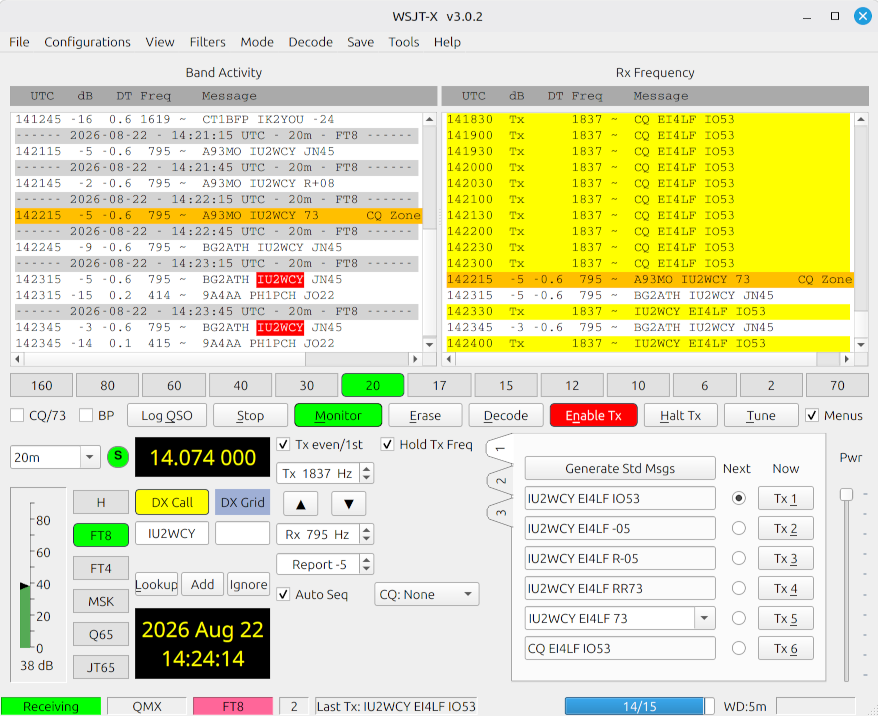
5. FT8 QSOA typical FT8 contact (QSO) follows a standard 6-step script:
6. WSJT-X Dashboard
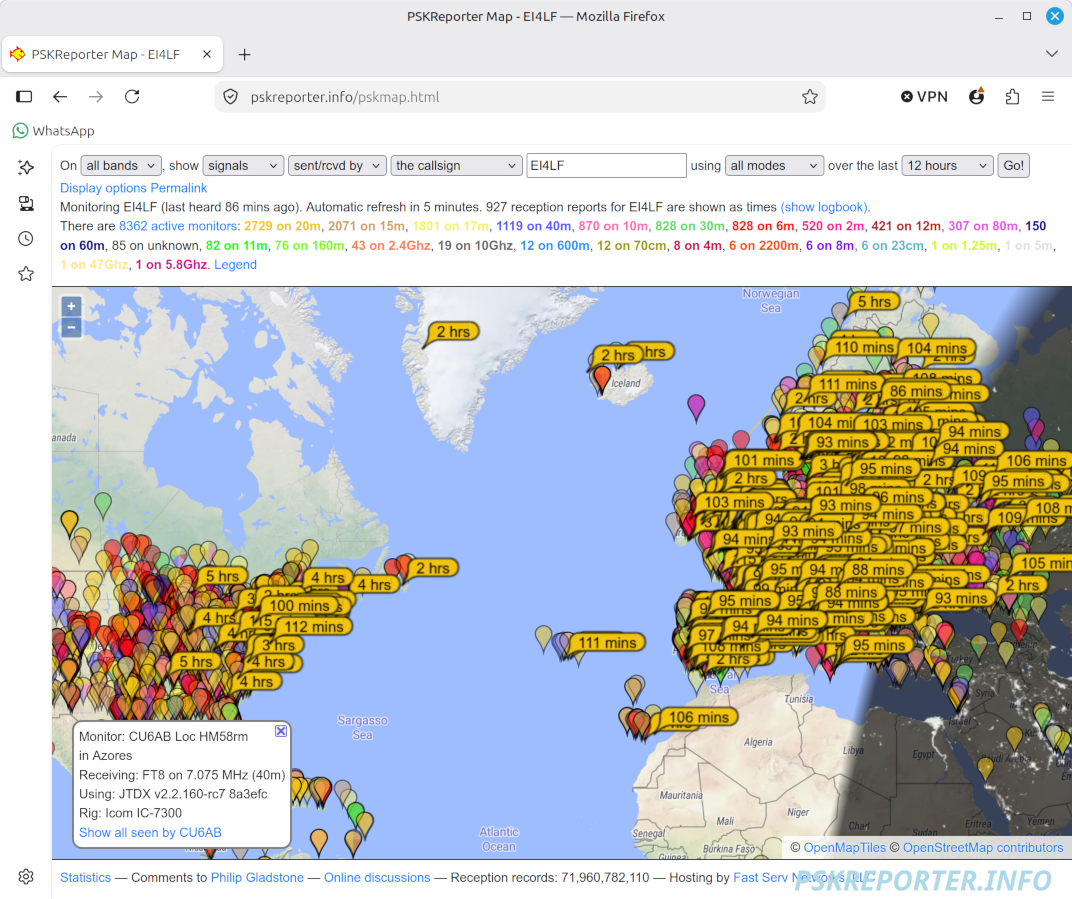
7. Monitor the log~$ tail -f ~/.local/share/WSJT-X/wsjtx_log.adi ADIF Export <adif_ver:5>3.1.1 <created_timestamp:15>20260822 135633 <programid:6>WSJT-X <programversion:5>3.0.2 <eoh> <call:6>CT1DTM <gridsquare:0> <mode:3>FT8 <rst_sent:3>+06 <rst_rcvd:3>-11 <qso_date:8>20260822 <time_on:6>145945 <qso_date_off:8>20260822 <time_off:6>150045 <band:3>20m <freq:9>14.075837 <station_callsign:5>EI4LF <my_gridsquare:6>IO53QU <tx_pwr:2>5w <operator:5>EI4LF <eor> 8. Use PSK ReporterPSK reporter illustrates how far the signal is getting from the station and being received by automated listening stations.
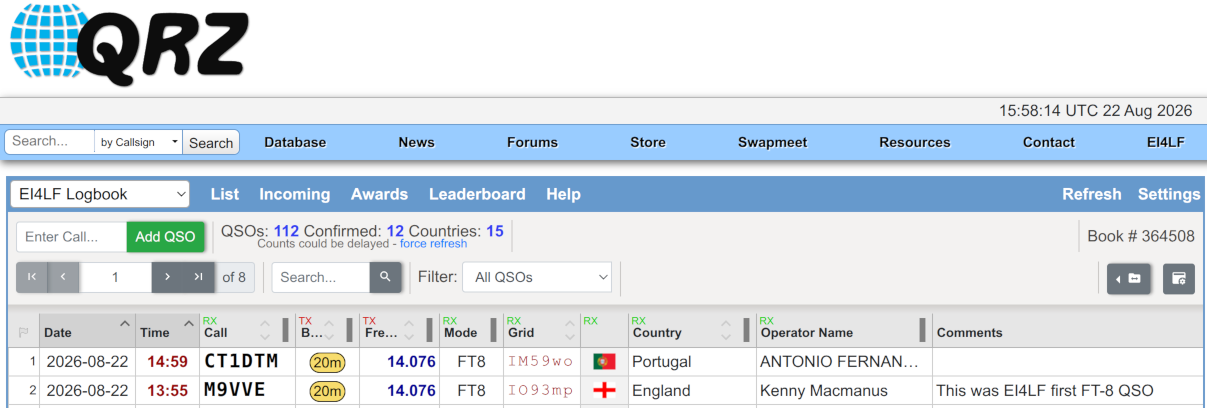
9. Uploading to QRZ.com LogLogin to QRZ.com My Logbook >> Settings >> ADIF Import/Export >> Import >> Choose File Select the ~/.local/share/WSJT-X/wsjtx_log.adi file Select Import ADI file. Check within the QRZ.com logbook.
|
  |
Copyright © 2026 C²S Consulting |