
Last updated: 10-05-2014 23:21
| HOME | Next >> |
So which Operating System is the best ? UNIX, BSD UNIX, OS X, MS Windows ? To some this question is as parochial as their favourite sport or even their religion. For the purpose of this paper the choice is GNU/Linux but within GNU/Linux there are distributions and the question is revisited, which of the GNU/Linux distributions are the best ? Again this can be akin to ones favourite team from their favourite sport, or their specific religion.
The distribution watch website is a good place to look at GNU/Linux distributions. It shows visit statistics to its page by hit to the page. The table groups statistics for 292 GNU/Linux distributions.
While distrowatch.org says that The DistroWatch Page Hit Ranking statistics are a light-hearted way of measuring the popularity of Linux distributions and other free operating systems among the visitors of this website. They correlate neither to usage nor to quality and should not be used to measure the market share of distributions. They simply show the number of times a distribution page on DistroWatch.com was accessed each day, nothing more. it is still a good indicator of popularity. Looking at the table below it can be seen that in general the same distributions occupy the top 10 positions. I am ignoring Puppy as it is designed as a very small distribution loaded into a ramdisk and is therefore not suitable for business applications.
| Table position | 1 | 2 | 3 | 4 | 5 | 6 | 7 | 8 | 9 | 10 | |
|---|---|---|---|---|---|---|---|---|---|---|---|
| Last 12 months | Mint | Ubuntu | Debian | Mageia | Fedora | openSUSE | PCLinuxOS | Arch | Manjaro | Puppy | |
| Last 6 months | Mint | Ubuntu | Debian | Mageia | Fedora | openSUSE | elementary | Arch | PCLinuxOS | Puppy | |
| Last 3 months | Mint | Ubuntu | Debian | Mageia | Fedora | openSUSE | elementary | Arch | Zorin | Puppy | |
| Last month | Mint | Ubuntu | Debian | elementary | Arch | Fedora | openSUSE | Mageia | Zorin | Lubuntu | |
Grouping the remaining 9 distributions based on the distribution they are forked from it can be seen that the various forks of Debian are significantly at the top with 48% of downloads. (i.e. Mint and Ubuntu are forks of Debian and Mageia, Redhat and PCLinuxOS are considered Fedora forks and Manjaro is a fork of Arch). In fact there are currently about 26 active GNU/Linux distributions based on Debian and many others forks of Ubuntu which itself is a fork of Debian. There are about 22 based on Fedora and many more based on Redhat which is also fork of Fedora.
| Position | Distribution | % of downloads | |
|---|---|---|---|
| 1 | Debian | 48 | |
| 2 | Fedora | 25 | |
| 3 | OpenSUSE | 13 | |
| 4 | Arch | 8 | |
From this I will look at Debian and Fedora as root distributions and pick two GNU/Linux distributions from one of these families.
Distribution watch. (Accessed: 23/04/2014).
Debian GNU/Linux is a distribution with a particular emphasis on free software. It has formalised principles in a social contract (Accessed: 23/04/2014).:
The 100% free label can be used as a stick against the distribution as there is an obvious requirement for non-free packages with commercial use. After much soul searching Debian decided to provide repositories that distribute contributions (contrib) that are freely licensed by the copyright holder but depend on other software that is not free and non-free repositories that contain packages which have some onerous license conditions restricting use or redistribution of the software.
Debian GNU/Linux and its forks use the dpkg package manager for installation of debian .deb packages. Additionally the apt higher level package manager is used to search repositories for packages plus their dependencies and ease the installation of these. As well as these a further utility called aptitude is an Ncurses, GUI-like frontend to apt that runs in a terminal. Since it is text based, it is run from a terminal shell Command Line Interface (CLI).
Fedora is a community supported Redhat Project. Fedora software is distributed under a free and open source license and aims to be at the leading edge, making use of the latest packages and developments. This means it is a distribution more suited to testing than implementation in a commercial environment. Red Hat Enterprise Linux (RHEL) is a fork of Fedora targeted at the commercial market. Redhat have a certification programme based on RHEL and sell it in packages depending on the deployment model. For example a standard Subscription for 1 year costs $799 while the premium subscription for a year costs $1,299. These packages include support Service Level Agreements (SLA). CentOS Linux is a community supported distribution derived from Red Hat Enterprise Linux (RHEL), essentially it is a free version of RHEL without the Redhat support. Fedora and RHEL are based on the Redhat Package Manager (rpm) and the Yellow dog Update (yum) is a higher level package manager that was developed by Duke University to improve the installation of rpm's. Yum searches repositories for packages and their dependencies so they may be installed together in an effort to remove dependency issues.
In summary RedHat is a Commercial Linux Distribution that is quite expensive to deploy while Debian is Non-commercial Linux Distribution that is free of cost.
Support
From a support perspective Debian GNU/Linux has significantly more resources on-line like the the Debian wiki, debianHELP, IRC chat help and Debian User Forums. ask.debian.net is a web-based Question and Answer (Q&A) support system. Debian provides an extensive database of consultants.
Debian wiki. (Accessed: 23/04/2014).
debianHELP. (Accessed: 23/04/2014).
IRC chat help. (Accessed: 23/04/2014).
Debian User Forums. (Accessed: 23/04/2014).
ask.debian.net. (Accessed: 23/04/2014).
Debian consultants. (Accessed: 23/04/2014).
Redhat Support pricing (Accessed 0405/2014).
|
| IRC #debian |
Training
Redhat training has a certification programme with Red Hat Certified Engineer (RHCE), Red Hat Certified System Administrator (RHCSA), Red Hat Certified Architect (RHCA) and Red Hat Certified Virtualisation Administrator (RHCVA) however while Debian GNU/Linux does not have a training programme the Linux Professional Institute (LPI) offers distribution independent GNU/Linux at Entry (Linux Essentials), Junior (LPIC-1), Advanced (LPIC-2) and Senior (LPIC-3) levels.
| Distribution family | Stable | Desktop | Training | Support | Cost | |
|---|---|---|---|---|---|---|
| Fedora/Redhat | RHEL/CentOS | RHEL Desktop/CentOS | Redhat/LPI | Redhat support/Consultancy | up to $1,299 / Free | |
| Debian GNU/Linux | Debian GNU/Linux | Ubuntu/Mint | LPI | Online resources/Consultancy | Free | |
Redhat Training (Accessed 0405/2014).
Linux Professional Institute (Accessed 0405/2014)
|
Server Stability
Both Redhat and Debian GNU/Linux are very stable, both can be obtained freely and both (or one of their forks) can be deployed in a server or desktop mode.
Selection
I do believe however that an organisation selecting a GNU/Linux for both Server and Desktop applications should do so from the same family grouping, they would therefore share package manager method and structure, making it easier to implement and support. I therefore choose to pick from the Debian GNU/Linux family, on the Server side the choice is between Debian GNU/Linux and Ubuntu Server. However considering that Ubuntu Server is forked from Debian GNU/Linux in the first place I believe the safe choice is to use Debian GNU/Linux directly. For the Desktop, Debian GNU/Linux is not suitable for standard users who want an elegant and workable graphical based Desktop. The choices here therefore are Ubuntu Desktop based on their own Gnome 3 Unity Desktop or Linux Mint cinnamon based on the GNU Image Manipulation Program (GIMP) Toolkit (GTK+) 3 Desktop. In fairness either would be fine, I just think the cinnamon desktop lives up to the Linux Mint tagline of from freedom came elegance and I therefore choose Linux Mint for the Desktop.
 |
| Distribution | Function | Version | Desktop | Release | init | Software cost | |
|---|---|---|---|---|---|---|---|
| Debian GNU/Linux | Server | Debian 7 (Wheezy) | Nil | Stable release | SystemV | Nil | |
| Linux Mint | Desktop | Mint 16 (Petra) | cinnamon | Long-Term Support (LTS) release | Upstart | Nil | |
Note: Debian GNU/Linux decided to switch to the systemd init system and as Ubuntu have decided to follow suit then both Debian and Linux Mint will have the systemd init in the future.
(2014). CTTE #727708 - Default init system for Debian. (Accessed: 24/04/2014).
Shuttleworth, M. (2014). Loosing graciously. (Accessed: 23/04/2014).
Debian | Fedora | Redhat | CentOS | Linux Professional Institute | Ubuntu | Linux Mint | Gnome 3 | GTK+ Project |
dmesg presents the GNU/Linux kernel messages to standard output (stdout). It is the output the kernel ring buffer. dmesg is a great starting point for analysis of the system hardware.
$ sudo dmesg | less
Kernel
Early in the dmesg stream the kernel is identified. This shows a generic Ubuntu based kernel as would be expected of a Linux Mint installation.
  Linux version 3.11.0-12-generic (buildd@komainu) (gcc version 4.8.1 (Ubuntu/Linaro 4.8.1-10ubuntu7) ) #19-Ubuntu SMP Wed Oct 9 16:12:00 UTC 2013 (Ubuntu 3.11.0-12.19-generic 3.11.3)
  BOOT_IMAGE=/boot/vmlinuz-3.11.0-12-generic root=UUID=09dbf921-34d3-4416-b520-d71b58059358 ro quiet splash vt.handoff=7
System
Also early in the dmesg information stream the system Dell Precision M70 (which could also be read on the surface of the laptop itself, the processor and available memory.
  DMI: Dell Inc. Precision M70  /0J4020, BIOS A04 03/20/2006
  Memory: 1000380K/1048024K available (6351K kernel code, 607K rwdata, 2640K rodata, 880K init, 908K bss, 47644K reserved, 135016K highmem)
  Detected 1862.035 MHz processor
  Calibrating delay loop (skipped), value calculated using timer frequency.. 3724.07 BogoMIPS (lpj=7448140)
  CPU0: Intel(R) Pentium(R) M processor 1.86GHz (fam: 06, model: 0d, stepping: 08)
  Total of 1 processors activated (3724.07 BogoMIPS)
PCI bus
THe PCI bus section gives cryptic but useful information on the hardware, however it is easier obtained using the command lspci.
  pci 0000:00:1d.0: reg 0x20: [io  0xbf80-0xbf9f]
  pci 0000:00:1d.1: reg 0x20: [io  0xbf60-0xbf7f]
  pci 0000:00:1d.2: reg 0x20: [io  0xbf40-0xbf5f]
  pci 0000:00:1d.3: reg 0x20: [io  0xbf20-0xbf3f]
  pci 0000:00:1d.7: reg 0x10: [mem 0xffa80800-0xffa80bff]
  .........
SCSI subsystem
The SCSI system shows an NEC DVD+/-RW unit.
  SCSI subsystem initialized
  ata1: SATA max UDMA/133 cmd 0x1f0 ctl 0x3f6 bmdma 0xbfa0 irq 14
  ata2: PATA max UDMA/100 cmd 0x170 ctl 0x376 bmdma 0xbfa8 irq 15
  ata2.00: ATAPI: _NEC DVD+/-RW ND-6650A, 102C, max UDMA/33
  scsi 1:0:0:0: CD-ROM NEC DVD+-RW ND-6650A 102C PQ: 0 ANSI: 5
The harddrive is shown as a Fujitsu harddrive. In fact it is a 100 GB, Internal, 5400 RPM, 6.35 cm Drive with an IDE interface. It is also shown that the first partition on the first harddrive has an EXT4 filesystem mounted as /dev/sda1.
  ata1.00: ATA-6: FUJITSU MHV2100AH, 00000096, max UDMA/100
  scsi 0:0:0:0: Direct-Access ATA FUJITSU MHV2100A 0000 PQ: 0 ANSI: 5
  EXT4-fs (sda1): mounted filesystem with ordered data mode. Opts: (null)
Graphics
nouveau is an Open Source project for the development of accelerated drivers for nVidia cards. This shows that the video card is an nVidia GeForce 6 Series graphics processor.
  nouveau  [  DEVICE][0000:01:00.0] Chipset: NV42 (NV42)
  nouveau  [  DEVICE][0000:01:00.0] Family : NV40
| Board Name | Core Type | Core (MHz) | Memory (MHz) | Memory Interface |
|---|---|---|---|---|
| 6800 GS | NV40/NV42 | 350/425 | 1000 | 256-bit | ||
Network
Two network devices show up in dmesg. The Tigon3 is the chipset on the Broadcom NetXtreme BCM5751M PCI-Express Gigabit Ethernet adapter. The ipw2200 drivers for the Intel(R) PRO/Wireless 2200/2915 Network card are non-free and therefore Debian will have difficulty installing unless the wired Ethernet connection is operational. Once installed adding non-free to /etc/apt/sources.list and a subsequent install of the firmware-ipw2x00 and wireless-tools packages resolves the issue.
  tg3 0000:02:00.0 eth0: Tigon3 [partno(BCM95751) rev 4001] (PCI Express) MAC address 00:12:3f:dc:ab:47
  tg3 0000:02:00.0 eth0: attached PHY is 5750 (10/100/1000Base-T Ethernet) (WireSpeed[1], EEE[0])

  ipw2200: Intel(R) PRO/Wireless 2200/2915 Network Driver, 1.2.2kmprq
  ipw2200: Copyright(c) 2003-2006 Intel Corporation
  ipw2200: Detected geography ZZE (13 802.11bg channels, 19 802.11a channels)
Pointer/Touchpad
This shows the touchpad and pointer types.
  input: DualPoint Stick as /devices/platform/i8042/seria1/input/input5
  input: AlpsPS/2 ALPS DualPoint TouchPad as /devices/platform/i8042/seria1/input/input6
USB
As it happens the laptop had USB Stick devices plugged in and these are shown by the kernel ring buffer.
  usb 4-1: Product: DataTraveler 2.0
  usb 4-1: Manufacturer: Kingston
  usb 4-1: SerialNumber: 08606E6D4162BD80A7110088
  usb-storage 4-1:1.0: USB Mass Storage device detected

  usb 1-6: Product: Ultra
  usb 1-6: Manufacturer: SanDisk
  usb 1-6: SerialNumber: 20051535821900D271F3
  sd 3:0:0:0: [sdb] 31266816 512-byte logical blocks: (16.0 GB/14.9 GiB)
Firstly install the procinfo package. This package gives the tools needed to display system statistics gathered from /proc, the process information pseudo-file system that gathers runtime system information.
$ sudo apt-get install procinfo
CPU
lscpu gathers CPU architecture information from sysfs and /proc/cpuinfo. A cat of the /proc/cpuinfo file can also be revealing.
  # lscpu

  Architecture:          i686
  CPU op-mode(s):        32-bit
  Byte Order:            Little Endian
  CPU(s):                1
  On-line CPU(s) list:   0
  Thread(s) per core:    1
  Core(s) per socket:    1
  Socket(s):             1
  Vendor ID:             GenuineIntel
  CPU family:            6
  Model:                 13
  Stepping:              8
  CPU MHz:               800.000
  BogoMIPS:              1595.74
  # cat /proc/cpuinfo

  processor	: 0
  vendor_id	: GenuineIntel
  cpu family	: 6
  model		: 13
  model name	: Intel(R) Pentium(R) M processor 1.86GHz
  stepping	: 8
  microcode	: 0x20
  cpu MHz		: 800.000
  cache size	: 2048 KB
  fdiv_bug	: no
  f00f_bug	: no
  coma_bug	: no
  fpu		: yes
  fpu_exception	: yes
  cpuid level	: 2
  wp		: yes
  flags		: fpu vme de pse tsc msr pae mce cx8 apic sep mtrr pge mca cmov clflush dts acpi mmx fxsr sse sse2 ss tm pbe nx bts est tm2
  bogomips	: 1595.74
  clflush size	: 64
  cache_alignment	: 64
  address sizes	: 32 bits physical, 32 bits virtual
  power management:
PCI Devices
lspci displays information about PCI buses and devices connected to them. A more detailed display is possible by using the -v and -vv option switches.
  # lspci -nn

  00:00.0 Host bridge [0600]: Intel Corporation Mobile 915GM/PM/GMS/910GML Express Processor to DRAM Controller [8086:2590] (rev 03)
  00:01.0 PCI bridge [0604]: Intel Corporation Mobile 915GM/PM Express PCI Express Root Port [8086:2591] (rev 03)
  00:1c.0 PCI bridge [0604]: Intel Corporation 82801FB/FBM/FR/FW/FRW (ICH6 Family) PCI Express Port 1 [8086:2660] (rev 03)
  00:1d.0 USB controller [0c03]: Intel Corporation 82801FB/FBM/FR/FW/FRW (ICH6 Family) USB UHCI #1 [8086:2658] (rev 03)
  00:1d.1 USB controller [0c03]: Intel Corporation 82801FB/FBM/FR/FW/FRW (ICH6 Family) USB UHCI #2 [8086:2659] (rev 03)
  00:1d.2 USB controller [0c03]: Intel Corporation 82801FB/FBM/FR/FW/FRW (ICH6 Family) USB UHCI #3 [8086:265a] (rev 03)
  00:1d.3 USB controller [0c03]: Intel Corporation 82801FB/FBM/FR/FW/FRW (ICH6 Family) USB UHCI #4 [8086:265b] (rev 03)
  00:1d.7 USB controller [0c03]: Intel Corporation 82801FB/FBM/FR/FW/FRW (ICH6 Family) USB2 EHCI Controller [8086:265c] (rev 03)
  00:1e.0 PCI bridge [0604]: Intel Corporation 82801 Mobile PCI Bridge [8086:2448] (rev d3)
  00:1e.2 Multimedia audio controller [0401]: Intel Corporation 82801FB/FBM/FR/FW/FRW (ICH6 Family) AC'97 Audio Controller [8086:266e] (rev 03)
  00:1e.3 Modem [0703]: Intel Corporation 82801FB/FBM/FR/FW/FRW (ICH6 Family) AC'97 Modem Controller [8086:266d] (rev 03)
  00:1f.0 ISA bridge [0601]: Intel Corporation 82801FBM (ICH6M) LPC Interface Bridge [8086:2641] (rev 03)
  00:1f.2 IDE interface [0101]: Intel Corporation 82801FBM (ICH6M) SATA Controller [8086:2653] (rev 03)
  01:00.0 VGA compatible controller [0300]: NVIDIA Corporation NV41GLM [Quadro FX Go1400] [10de:00cc] (rev a2)
  02:00.0 Ethernet controller [0200]: Broadcom Corporation NetXtreme BCM5751 Gigabit Ethernet PCI Express [14e4:1677] (rev 01)
  03:01.0 CardBus bridge [0607]: Texas Instruments PCI6515 Cardbus Controller [104c:8036]
  03:01.5 Communication controller [0780]: Texas Instruments PCI6515 SmartCard Controller [104c:8038]
  03:03.0 Network controller [0280]: Intel Corporation PRO/Wireless 2915ABG [Calexico2] Network Connection [8086:4223] (rev 05)
USB Devices
lsusb displays information about USB buses and the devices connected to them. The -v switch can be used for additional information.
  # lsusb

  Bus 001 Device 004: ID 0781:556c SanDisk Corp.
  Bus 001 Device 001: ID 1d6b:0002 Linux Foundation 2.0 root hub
  Bus 005 Device 001: ID 1d6b:0001 Linux Foundation 1.1 root hub
  Bus 004 Device 001: ID 1d6b:0001 Linux Foundation 1.1 root hub
  Bus 003 Device 002: ID 413c:8103 Dell Computer Corp. Wireless 350 Bluetooth
  Bus 003 Device 001: ID 1d6b:0001 Linux Foundation 1.1 root hub
  Bus 002 Device 001: ID 1d6b:0001 Linux Foundation 1.1 root hub
Devices
lsdev gathers information about hardware and the interrupts, ioports and dma files in the /proc directory. It shows what hardware uses what I/O addresses and what IRQ and DMA channels.
  # lsdev

  Device            DMA   IRQ  I/O Ports
  ------------------------------------------------
  0000:00:1d.0                 bf80-bf9f
  0000:00:1d.1                 bf60-bf7f
  0000:00:1d.2                 bf40-bf5f
  0000:00:1d.3                 bf20-bf3f
  0000:00:1e.2                 ec40-ec7f ed00-edff
  0000:00:1e.3                 ec80-ecff ee00-eeff
  0000:00:1f.0                 1000-107f   1080-10bf
  0000:00:1f.2                 0170-0177 01f0-01f7 0376-0376 03f6-03f6 bfa0-bfaf
  acpi                      9
  ACPI                           1000-1003   1004-1005   1008-100b   1020-1020     1028-102f 10e0-10e5
  ata_piix              14 15    0170-0177   01f0-01f7   0376-0376   03f6-03f6   bfa0-bfaf
  cascade           4
  dma                          0080-008f
  dma1                         0000-001f
  dma2                         00c0-00df
  eth0                     16
  fpu                          00f0-00ff
  gpio_ich                       1028-102f 1080-10bf       1080-10af       10b0-10bf
  i8042                  1 12
  Intel                          ec40-ec7f   ed00-edff
  ipw2200                  17
  iTCO_wdt                       1030-1033   1060-107f
  keyboard                     0060-0060 0064-0064
  PCI                          0cf8-0cff 2000-2fff 3000-3fff   3000-30ff   3400-34ff
  pic1                         0020-0021
  pic2                         00a0-00a1
  pnp                          04d0-04d1 0900-090f 0910-091f 0920-092f 0930-093b 093c-093f 0940-097f     1080-10bf 10c0-10df f400-f4fe
  rtc0                      8  0070-0071
  serial                       03f8-03ff
  timer                     0
  timer0                       0040-0043
  timer1                       0050-0053
  uhci_hcd                       bf20-bf3f   bf40-bf5f   bf60-bf7f   bf80-bf9f
  uhci_hcd:usb4            18
  yenta                    19
$ sudo apt-get install unetbootin
  $ sudo fdisk /dev/sdb

  Command (m for help): p

  Disk /dev/sdb: 62.0 GB, 61985783808 bytes
  128 heads, 63 sectors/track, 15013 cylinders, total 121065984 sectors
  Units = sectors of 1 * 512 = 512 bytes
  Sector size (logical/physical): 512 bytes / 512 bytes
  I/O size (minimum/optimal): 512 bytes / 512 bytes
  Disk identifier: 0xc3072e18

     Device Boot      Start         End      Blocks   Id  System
  /dev/sdb1            2048    97656831    48827392   83  Linux
  /dev/sdb2        97656832   105469951     3906560   82  Linux swap / Solaris
  /dev/sdb3       105469952   121065471     7797760    b  W95 FAT32

  Command (m for help): d
  Partition number (1-4): 1

  Command (m for help): d
  Partition number (1-4): 2

  Command (m for help): d
  Partition number (1-4): 3

  Command (m for help): n
  Partition type:
     p   primary (0 primary, 0 extended, 4 free)
     e   extended
  Select (default p): p
  Partition number (1-4, default 1): 1
  First sector (2048-121065983, default 2048):
  Using default value 2048
  Last sector, +sectors or +size{K,M,G} (2048-121065983, default 121065983):
  Using default value 121065983

  Command (m for help): p

  Disk /dev/sdb: 62.0 GB, 61985783808 bytes
  64 heads, 32 sectors/track, 59114 cylinders, total 121065984 sectors
  Units = sectors of 1 * 512 = 512 bytes
  Sector size (logical/physical): 512 bytes / 512 bytes
  I/O size (minimum/optimal): 512 bytes / 512 bytes
  Disk identifier: 0xc3072e18

     Device Boot      Start         End      Blocks   Id  System
  /dev/sdb1            2048   121065983    60531968   83  Linux

  Command (m for help): w
  The partition table has been altered!

  Calling ioctl() to re-read partition table.

  WARNING: Re-reading the partition table failed with error 16: Device or resource busy.
  The kernel still uses the old table. The new table will be used at
  the next reboot or after you run partprobe(8) or kpartx(8)
  Syncing disks.
$ sudo unetbootin
 |
 |
 |
 |
UNetbootin webpage. (Accessed: 23/04/2014).
Put USB Stick in Laptop and boot into the Basic Input/Output System (BIOS).
 |
 |
Install the image the way it is required for the organisation. For demonstration, I will install docky to have a unique template.
  $ sudo apt-get install docky
  $ sudo apt-get install freeplane
  $ sudo apt-get install planner
  $ sudo apt-get install dia
$ sudo unetbootin
 |
Put the USB Sticks in the template laptop and reboot. Now follow the instructions to clone the image.
/usr/sbin/ocs-sr -q2 -c -j2 -z1 -i 2000 -p true savedisk 20140426-PETRA-XYZ-INC-image sda
Image is cloned to the second USB Stick.
Using the procedure already shown create a USB Stick filesystem with two partitions.
  Command (m for help): p

  Disk /dev/sdb: 16.0 GB, 16008609792 bytes
  64 heads, 32 sectors/track, 15267 cylinders, total 31266816 sectors
  Units = sectors of 1 * 512 = 512 bytes
  Sector size (logical/physical): 512 bytes / 512 bytes
  I/O size (minimum/optimal): 512 bytes / 512 bytes
  Disk identifier: 0x00000000

     Device Boot      Start         End      Blocks   Id  System
  /dev/sdb1            2048    15632383     7815168   83  Linux
  /dev/sdb2        15632384    31266815     7817216   83  Linux
  $ sudo mkfs /dev/sdb1

  mke2fs 1.42.8 (20-Jun-2013)
  $ sudo mkfs /dev/sdb2

  mke2fs 1.42.8 (20-Jun-2013)
Using unetbootin make a bootable Clonezilla image on the first partition. On the second copy the Petra image.
Destroy the operating system on the laptop by deleting essential directories and rebooting. The laptop will fail to boot and must be recovered.
Place in laptop to be recovered and boot of the USB Stick.
The Laptop is now back where it was before the corruption.
 |
Clonezilla website. (Accessed: 26/04/2014).
Clonezilla Live Doc. (Accessed: 26/04/2014).
Reed, M. (2013). Clonezilla tutorial. (Accessed: 26/04/2014).
Wallen, J. (2011). DIY: Image your drives for free with Clonezilla. (Accessed: 28/04/2014).
Having gone through this process I think it is not much slower to simply use the Linux Mint bootable USB, do a fresh install and then execute the following script to install the few missing applications. This could be stored in the /home/itsupport/.itsupport/ directory along with the other scripts.
  $ vi app_install.sh

  #!/bin/bash

  apt-get install docky
  apt-get install freeplane
  apt-get install planner
  apt-get install dia
  $ sudo /home/itsupport/.itsupport/app_install.sh

  Reading package lists... Done
  Building dependency tree
  .......
 |
Use the itsupport.sh script (Appendix 1) to add an IT Support user with a default password of 1tpa55wd and the IT Support files to the client machine. This script adds the user, gives the user sudo permissions, creates a hidden directory .itsupport in the home directory of the IT Support user. It also changes the permissions of the files such that only the IT Support user or the Super User can execute the scripts or read the configuration files. Additionally it determines if the user given on the command line already exists and if not it creates the user with a default password of tem66a55.
  $ sudo ./itsupport.sh -h

  HELP
  ====

  NAME	itsupport.sh

  The program itsupport.sh reads in variables from the command line options.

  -l	Local User
  -r	Remote User
  -p	Remote Password
  -h	Help page

  EXAMPLE:	itsupport.sh -l dobriain -r backupuser -p backuppass
  $ sudo ./itsupport.sh -ldobriain -rbackupuser -pbackuppass

  Creating user dobriain
  useradd -m dobriain
  Creating user itsupport
  useradd -m itsupport
  Creating directory /home/itsupport/.itsupportfiles
  Connected to fta.obriain.com.
  sftp>    cd itsupport
  sftp>    lcd /home/itsupport/.itsupportfiles/
  sftp>    get *
  Fetching /home/backupuser/itsupport/fta_backup.conf to fta_backup.conf
  Fetching /home/backupuser/itsupport/fta_backup.sh to fta_backup.sh
  sftp>    bye
  Adding ''itsupport'' to the /etc/group sudo group users list, note there is another user in the list
Note that a regular user cannot access the itsupport files.
  dobriain@riomhaireOB ~ $ ls /home/itsupport/.itsupportfiles/

  ls: cannot open directory /home/itsupport/.itsupportfiles/: Permission denied

  dobriain@riomhaireOB ~ $ sudo ls /home/itsupport/.itsupportfiles/

  fta_backup.conf  fta_backup.sh
$ sudo mkfs /dev/sdb1
$ sudo cp debian-7.5.0-i386-netinst.iso /dev/sdb; sync
      [ ] Debian Desktop environment
      [ ] Web server
      [ ] Print server
      [ ] SQL server
      [ ] DNS server
      [ ] File server
      [ ] Mail server
      [*] SSH server
      [ ] Laptop
      [*] Standard system utilities
  $ ip -4 addr

  1: lo: <LOOPBACK,UP,LOWER_UP> mtu 16436 qdisc noqueue state UNKNOWN
      inet 127.0.0.1/8 scope host lo
  2: eth0: <BROADCAST,MULTICAST,UP,LOWER_UP> mtu 1500 qdisc mq state UP qlen 1000
      inet 192.168.22.142/24 brd 192.168.22.255 scope global eth0
  $ ssh debianuser@192.168.22.142

  The authenticity of host '192.168.22.142 (192.168.22.142)' can't be established.
  ECDSA key fingerprint is ac:33:11:c1:1b:c6:37:3f:a1:c0:69:58:8f:b9:da:8f.
  Are you sure you want to continue connecting (yes/no)? yes
  Warning: Permanently added '192.168.22.142' (ECDSA) to the list of known hosts.
  debianuser@192.168.22.142's password:
  Linux fta 3.2.0-4-686-pae #1 SMP Debian 3.2.57-3 i686

  The programs included with the Debian GNU/Linux system are free software;
  the exact distribution terms for each program are described in the
  individual files in /usr/share/doc/*/copyright.

  Debian GNU/Linux comes with ABSOLUTELY NO WARRANTY, to the extent
  permitted by applicable law.
  Last login: Sun May  4 11:31:55 2014
  $ su
  Password:
  # vi /etc/apt/sources.list


  # deb cdrom:[Debian GNU/Linux 7.5.0 _Wheezy_ - Official i386 NETINST Binary-1 20140426-12:25]/ wheezy main
  # deb cdrom:[Debian GNU/Linux 7.5.0 _Wheezy_ - Official i386 NETINST Binary-1 20140426-12:25]/ wheezy main

  deb http://ftp.ie.debian.org/debian/ wheezy main contrib non-free
  deb-src http://ftp.ie.debian.org/debian/ wheezy main

  deb http://security.debian.org/ wheezy/updates main
  deb-src http://security.debian.org/ wheezy/updates main

  # wheezy-updates, previously known as 'volatile'
  deb http://ftp.ie.debian.org/debian/ wheezy-updates main
  deb-src http://ftp.ie.debian.org/debian/ wheezy-updates main
  # apt-get update

  Fetched 221 kB in 0s (344 kB/s)
  Reading package lists... Done
  # apt-get install firmware-ipw2x00
  # apt-get install wireless-tools
  # reboot
  # dmesg | grep ipw2200

  [    7.079725] ipw2200: Intel(R) PRO/Wireless 2200/2915 Network Driver, 1.2.2kmprq
  [    7.079733] ipw2200: Copyright(c) 2003-2006 Intel Corporation
  [    7.079947] ipw2200: Detected Intel PRO/Wireless 2915ABG Network Connection
  [    7.318844] ipw2200 0000:03:03.0: firmware: agent loaded ipw2200-bss.fw into memory
  [    7.449729] ipw2200: Detected geography ZZE (13 802.11bg channels, 19 802.11a channels)
This is the starting point to building the Debian GNU/Linux server. In my scenario the Debian GNU/Linux servers are on Virtual Machines (VM) on a Xen Hypervisor but essentially these VMs would look much like the point where this installation is at now.
 |
For Mail, Calendar and File Storage I decided to go with two German lead Open Source Projects, IPSConfig which is a hosting control panel for a number of Open Source projects and is itself is licensed under the BSD License. It allows for the management of websites, e-mail addresses and DNS records through a web based interface.
To deal with files I could use the fta_backup.sh script I developed below by adding a cronjob on each user laptop to backup on a regular scheduled basis. For this organisation I have choosen to create an owncloud service, this is licensed under the Affero GPL (AGPL) license. The service will be ran on a company VM server and for redundancy an adjusted form of the fta_backup.sh script will be used to backup the contents of the owncloud directory as well as the additional backup of using Xen VM snapshots. Owncloud will also provide the organisation calendar service.
ISPConfig
owncloud
  $ cd /tmp
  $ wget --no-check-certificate -O ISPConfig3.tgz https://github.com/dclardy64/ISPConfig-3-Debian-Installer/tarball/master
  $ tar zxvf ISPConfig3.tgz
  $ cd *Installer*
  $ sudo bash install.sh

  Is the Main IP of the Server? Yes
  Please specify a short name: fta
  Fully Qualified Hostname: fta.obriain.com
  Install a webserver: Yes - Apache
  Install a mailserver: Yes - Dovecot
  Install an SQL Server software: MySQL
  MySQL Root Password: ispconfig
  Install an FTP Server: No
  Install a DNS Server: No
  Setup user quotas: Yes
  Setup mailman: Yes
  Setup User Jailkits: Yes

  You will be prompted for some information during the install of phpmyadmin.
  Select NO when asked to configure using dbconfig-common
  Please enter them where needed.

  Press Enter to continue: <ENTER>

  Configure database for phpmyadmin with dbconfig-common? No

  You will be prompted for some information during the install.
  Select the languages you want to support and hit OK when told about the missing site list
  You will also be asked for the email address of person running the list & password for the list.
  Please enter them where needed.

  Press ENTER to continue: <ENTER>

  Languages to support: en
  Missing site list: Click OK
  Enter the email of the person running the list: diarmuid@obriain.com
  Initial mailman password: mailmanpass
  Hit enter to notify mailman owner...

  When prompted, type D! Then type the mailserver you choose (Dovecot),
  and hit enter. Type S, Hit Enter. Type Q, Hit Enter.

  Press ENTER to continue: <ENTER>

  SquirrelMail Configuration:
  Command >> d

  Please select your IMAP server: dovecot = Dovecot Secure IMAP server

  Command >> s

  Data saved in config.php
  Press enter to continue... <ENTER>

  Command >> q

  --------------------------------------------------------------------------------
   _____ ___________   _____              __ _         ____
  |_   _/  ___| ___ \ /  __ \            / _(_)       /__  \
    | | \ `--.| |_/ / | /  \/ ___  _ __ | |_ _  __ _    _/ /
    | |  `--. \  __/  | |    / _ \| '_ \|  _| |/ _` |  |_ |
   _| |_/\__/ / |     | \__/\ (_) | | | | | | | (_| | ___\ \
   \___/\____/\_|      \____/\___/|_| |_|_| |_|\__, | \____/
                                                __/ |
                                               |___/
  --------------------------------------------------------------------------------

  >> Initial configuration

  Operating System: Debian 7.0 (Wheezy/Sid) or compatible

      Following will be a few questions for primary configuration so be careful.
      Default values are in [brackets] and can be accepted with <ENTER>.
      Tap in "quit" (without the quotes) to stop the installer.


  Select language (en,de) [en]: <ENTER>

  Installation mode (standard,expert) [standard]: <ENTER>

  Full qualified hostname (FQDN) of the server, eg server1.domain.tld  [fta.obriain.com]:

  MySQL server hostname [localhost]:
  MySQL root username [root]:
  MySQL root password []: ispconfig
  MySQL database to create [dbispconfig]:
  MySQL charset [utf8]:
  Generating a 4096 bit RSA private key
  .....++
  ...........................................................................................++
  writing new private key to 'smtpd.key'
  -----

  You are about to be asked to enter information that will be incorporated
  into your certificate request.
  What you are about to enter is what is called a Distinguished Name or a DN.
  There are quite a few fields but you can leave some blank
  For some fields there will be a default value,
  If you enter '.', the field will be left blank.
  -----
  Country Name (2 letter code) [AU]: IE
  State or Province Name (full name) [Some-State]: Munster
  Locality Name (eg, city) []: Limerick
  Organization Name (eg, company) [Internet Widgits Pty Ltd]: obriain.com
  Organizational Unit Name (eg, section) []: fta
  Common Name (e.g. server FQDN or YOUR name) []: fta.obriain.com
  Email Address []: diarmuid@obriain.com
  Configuring Jailkit
  Configuring Dovecot
  Configuring Spamassassin
  Configuring Amavisd
  Configuring Getmail
  Configuring Pureftpd
  Configuring MyDNS
  Configuring Apache
  Configuring Vlogger
  Configuring Apps vhost
  Configuring Bastille Firewall
  Configuring Fail2ban
  Installing ISPConfig

  ISPConfig Port [8080]: <ENTER>

  Do you want a secure (SSL) connection to the ISPConfig web interface (y,n) [y]:

  Generating RSA private key, 4096 bit long modulus
  ...............................++
  ......................................................................................................................................................................................................................................................................................................................................++
  e is 65537 (0x10001)
  You are about to be asked to enter information that will be incorporated
  into your certificate request.
  What you are about to enter is what is called a Distinguished Name or a DN.
  There are quite a few fields but you can leave some blank
  For some fields there will be a default value,
  If you enter '.', the field will be left blank.
  -----
  Country Name (2 letter code) [AU]: IE
  State or Province Name (full name) [Some-State]: Munster
  Locality Name (eg, city) []: Limerick
  Organization Name (eg, company) [Internet Widgits Pty Ltd]: obriain.com
  Organizational Unit Name (eg, section) []: fta
  Common Name (e.g. server FQDN or YOUR name) []: fta.obriain.com
  Email Address []: diarmuid@obriain.com

  Please enter the following 'extra' attributes
  to be sent with your certificate request
  A challenge password []: sslpass
  An optional company name []: obriain.com
  writing RSA key
  Configuring DBServer
  Installing ISPConfig crontab
  no crontab for root
  no crontab for getmail
  Restarting services ...
  Stopping MySQL database server: mysqld.
  Starting MySQL database server: mysqld ..
  Checking for tables which need an upgrade, are corrupt or were
  not closed cleanly..
  Stopping Postfix Mail Transport Agent: postfix.
  Starting Postfix Mail Transport Agent: postfix.
  Stopping amavisd: amavisd-new.
  Starting amavisd: amavisd-new.
  Stopping ClamAV daemon: clamd.
  Restarting IMAP/POP3 mail server: dovecot.
  [Sat May 03 10:38:27 2014] [warn] NameVirtualHost *:443 has no VirtualHosts
  [Sat May 03 10:38:28 2014] [warn] NameVirtualHost *:443 has no VirtualHosts
  Restarting web server: apache2 ... waiting .
  Installation completed.
Browse to the ISP Config control panel. The default post installation username is admin with a password of admin.
 |
Change the admin users password immediately at Tools > User Settings > Password and Language
Password: 1psc0nf1gpa55 Password strength Repeat Password: 1psc0nf1gpa55 Language: en
ISPConfig Manual. (Accessed 30/04/2014).
Timme, T. (2013). The Perfect Server - Debian Wheezy. (Accessed 02/05/2014).
Run the Debian backports to the server to allow access to owncloud package.
  $ sudo echo -ne "\n# wheezy backports\n" >> /etc/apt/sources.list
  $ sudo echo -ne "deb http://ftp.debian.org/debian wheezy-backports main contrib non-free\n" /etc/apt/sources.list
  $ sudo apt-get update
Add the following packages to the Server.
  $ sudo apt-get install apache2
  $ sudo apt-get install mysql-server
  $ sudo apt-get install php5
  $ sudo apt-get install owncloud
Check the server locale.
  $ locale -a
  C
  C.UTF-8
  en_IE.utf8
  POSIX
Select locale-gen en_US.UTF-8 as well as the configured locale.
  $ sudo  dpkg-reconfigure locales
  Generating locales (this might take a while)...
    en_IE.UTF-8... done
    en_US.UTF-8... done
  Generation complete.
Create a table in the MySQL database for owncloud.
  $ mysql -u root -p
  Enter password: rootpass
  mysql> CREATE DATABASE owncloud;
  mysql> USE owncloud;
  mysql> CREATE USER 'owncloudusr'@'localhost' IDENTIFIED BY 'owncloudpass';
  mysql> GRANT ALL ON owncloud.* TO 'owncloudusr'@'localhost';
Login to database to ensure it is created correctly.
  $ mysql -u owncloudusr -p
  Enter password: owncloudpass
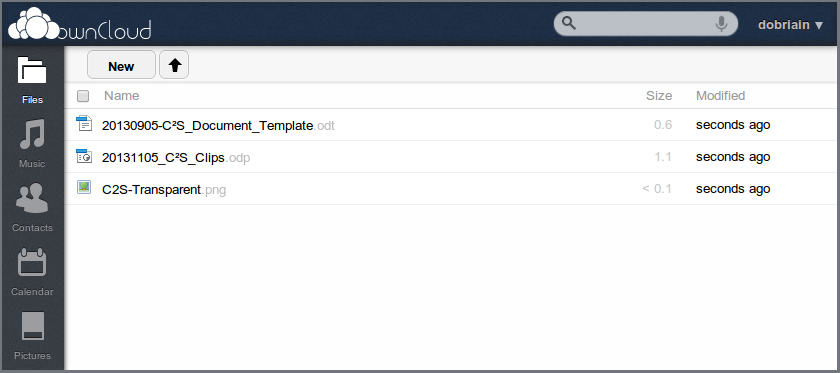
Now you can connect to the owncloud service to configure.
 |
Add users to the service as necessary.
$ sudo ln -s /usr/share/owncloud/data/ /projects
$ sudo chown www-data:www-data -r owncloud
On Linux clients add the owncloud client service.
$ sudo apt-get install owncloud-client
Clients for other operating systems can be downloaded from: Owncloud clients
Mobile Operating System clients can be downloaded from the respective app stores.
One of the issues converting MS Windows and Apple MAC users to GNU/Linux is the problem of Office Suite file formats. To cater for this I will use the ms_convert.sh script (See Appendix 1). Applying the ms_converter.sh to the /project directory sees the MS Office files converted to OpenDocument Formats and the original MS Office formatted files consigned to an archive file ms_archive.tar.bz2.
  $ sudo ./msdoc_converter.sh -h

  HELP
  ====

  NAME	ms_convert.sh

  The program ms_converter.sh mass converts MS Office documents to OpenDocument Format.
  It also creates an archive of the original MS Office files.

  -h	Help page
  -d	Root directory for conversion (if not the detault /project)

  USAGE:		ms_convert.sh -d <Root directory>
  EXAMPLE:	ms_convert.sh -d /project
  $ msdoc_converter.sh -d /project

  Creating archive of the MS Office original files
  Completed archive of the MS Office original files as /project/ms_archive.tar.bz2
  ...
  Converting /project/NetworkDesign/NetworkAnalysisDesign2003Summer.doc to .odt format
  Converting /project/NetworkDesign/Question_Section3.ppt to .odp format
  Converting /project/NetworkDesign/modelling2.doc to .odt format
  Converting /project/NetworkDesign/FloydAlgorithm.ppt to .odp format
  Converting /project/NetworkDesign/Assignment2_v2.doc to .odt format
  Converting /project/NetworkDesign/BottleneckAlgorithm.ppt to .odp format
  Converting /project/NetworkDesign/Activity4_Section3.41.ppt to .odp format
  Converting /project/NetworkDesign/ErlangB_Calculator.xls to .odt format
  Converting /project/Safety_Docs/HR0003-Health_and_Welfare_Statement.doc to .odt format
  Converting /project/Safety_Docs/ENG0018-Field_Operations_Guidelines.doc to .odt format
  Converting /project/Safety_Docs/ENG0047-Restricted_Electrical_Works.doc to .odt format
  Converting /project/Safety_Docs/ENG0017-Tower_Rescue_SOP.doc to .odt format
  Converting /project/Safety_Docs/ENG0019-Method_Statement_Template.docx to .odt format
  Converting /project/Hari_Nair_ACTIONS.xlsx to .odt format

  Conversion of MS Office files to ODF format is complete.
  An archive of the original files is stored as /project/ms_archive.tar.bz2.
Scenario
All employees have a company laptop. Each laptop is configured independently, and there are no centralized file storage, or printing services. Diverse office software is in use (MSOffice 2003, MSOffice for MAC, etc.). As far as this part of the CAA is concerned, we can assume ignore any hardware configuration and hardware compatibility issue.
There are 500 employees, 400 with Intel-based PC's running several versions of Windows, and 100 using types of Apple computers.
The management wants to move to a uniform structure. An analysis has shown that there is no need of the advanced functions in the last version of MS Office, so a switch to Apache Apache OpenOffice or Libre Office or LibreOffice and other Free/Open Source Software on Linux is possible. For the moment, however, there is no need of cloud-based applications, partly because many employees often go to visit customers without broadband. The goals of the migrations are:
Other, particular requirements: Maintenance of older products and services from pre-existing projects requires that 10 Windows computers, on which legacy, proprietary software must keep running, remain visible from the internal network, but (unlike the Linux clients) have no access to the Internet.
As this is quite a sizeable organisation it is essential that security of organisation Intellectual Property and information are stored in a safe manner. It is also essential that uptime of the systems is considered a priority by the IT Department. To manage this it is decided to build two Xen hypervisors in two independent Data Centres to provide High Availability (HA). The Virtual Machines (VM) on these hypervisors will be backed up by the taking of Logical Volume Manager (LVM) snapshots at regular intervals as well redundant VMs with essential services.
The configuration of Xen is outside the scope of this paper.
From a routing perspective the network has 3 subnets assigned. 78.143.140.0/24, 89.184.35.0/24 and 2a02:2158:54a2::/48. The network will be divided into 3 RFC2328 - Open Shortest Path First (OSPF) v2 Areas with the core servers in the Backbone OSPFv2 Area 0.0.0.0. Redistribution of routes to RFC 4271 - Border Gateway Protocol 4 (BGP4) will be handled in the core also by Autonomous System Border Routers (ASBR). The second Area 10.0.0.0 contains the client computers and a third Area 20.0.0.0 has the MS Windows computers grouped such that they can be managed seperately from a routing perspective. The Area Border Router (ABR) in the backbone Area 0.0.0.0 allows traffic to and from Area 20.0.0.0 to Area 10.0.0.0 but does not allow traffic from Area 20.0.0.0 to be routed to the core network or handed to BGP4 in the redistribution of routes process.
The IP Transit pipes to the two Internet Service Providers (ISP) are managed by BGP4 routing protocol with each ISPs gateway router. Route aggregation of the companies two Class C IPv4 subnets and the /48 IPv6 network is maintained.
A similar process exists for RFC 2460 - IPv6 except that the RFC 5340 - OPSFv3 has no Area for the MS Windows Computer subnet. Additionally the router interface facing the MS Windows Computers is configured such that it does not respond to Neighbour Discovery Protocol (NDP) and therefore a prefix will not be assigned and the Stateless Address Auto Configuration (SLAAC) process will fail. Any MS Windows Computers with an IPv6 stack will therefore be left with a Link-Local address only.
Xen website. (Accessed: 01/05/2014).
Citrix XenServer. (Accessed: 01/05/2014).
RFC2328 - Open Shortest Path First (OSPF). (Accessed: 01/05/2014).
RFC 4271 - Border Gateway Protocol 4 (BGP4). (Accessed: 01/05/2014).
RFC 5340 - OPSFv3. (Accessed: 01/05/2014).
RFC 2460 - IPv6. (Accessed: 01/05/2014).
 |
| Network Diagram |
It is possible to install Linux Mint on Apple Mac platforms however for this migration these users will be migrated to Lenovo ThinkPad Edge E540 Laptops with the Linux Mint distribution.
Ho, Y. (2014). Linux Mint on MacBook Pro. (Accessed: 27/04/2014).
(2013). Linux Mint Mac Install. (Accessed: 27/04/2014). YOUTUBE.
From those available on the market, which is suitable for the work as described above, and use it as basis for the exercise. Choose the servers for the tasks outlined above, and motivate your choice.
Laptop model [1]:
| Description | Value |
|---|---|
| Lenovo ThinkPad Edge E540 | EUR 676.23 |
| - Screen size : 39.6 cm | |
| - 4 GB RAM | |
| - 500 GB Harddrive | |
| - Intel Core i5 Processor | |
| EUR 676.23 |
Server model [2]:
| Qty | Description | Value | Total |
|---|---|---|---|
| 2 | HP DL380EG8 E5-2407 1P SP7752TV EU S | EUR 1193.63 | EUR 2387.26 |
| 4 | HP 4GB 2RX8 PC3L-10600E-9 KIT | EUR 52.45 | EUR 209.80 |
| 4 | HP 500GB 6G SATA 7.2K 2.5IN SC MDL H | EUR 213.03 | EUR 852.12 |
| 2 | HP 460W HE 12V HOTPLG AC PWR SUPPLY | EUR 165.93 | EUR 331.86 |
| 2 | HP DL380E GEN8 E5-2407 KIT | EUR 283.69 | EUR 567.38 |
| EUR 4348.42 | EUR 8696.84 | ||
Overall cost of equipment and Data Centre cabinet rental.
| Description | Function | Quantity | Unit cost | Cost | |
|---|---|---|---|---|---|
| HP DL380EG8 Servers complete | Core Xen Hypervisor platforms | 2 | EUR 4348.42 | EUR 8696.84 | |
| HP Support contract | Hardware 4 business hours support | 1 | EUR 8750.00 | EUR 8750.00 | |
| Data Centre 1/2 cabinet rental | TeleCity and Citadel 100 (12 months) | 2 | EUR 9000.00 | EUR 18000.00 | |
| Lenovo ThinkPad Edge E540 | Replacement for Apple Mac computers | 100 | EUR 676.23 | EUR 67623.00 | |
| Lenovo ThinkPad Edge E540 | Replacement for obsolete x86 computers | 150 | EUR 676.23 | EUR 101434.50 | |
| EUR 23450.88 | EUR 204504.34 | ||||
[1] Pricing from Westcoast.
[2] Pricing from laptopsdirect.ie.
Describe in detail how you would estimate the cost of "migrating" the employees to the new office environment:
The migration Project Plan is attached with this document. In this case I have assumed that:
The project itself will draw heavily on the resources of 6 IT Personnel, this is detailed in the Project plan. An estimate of the labour costs involved is EUR 140,680. Along with the hardware the overall cost is therefore almost EUR 350,000.
| Personnel | Labour cost | |
| Project Manager | EUR 220,000 | |
| Linux Administrator | EUR 160,000 | |
| Linux Programmer | EUR 160,000 | |
| Linux Technician #1 | EUR 85,000 | |
| Linux Technician #2 | EUR 85,000 | |
| Linux Trainer | EUR 100,000 | |
Note: The labour costs are annualised and loaded to include costs associated with employer contributions for Pay Related Social Insurance (PRSI), pension contributions, medical contributions, heat and light and rental.
 |
The FOSS Migration Project Plan. has been posted to the website. It is also available as an attachment to this CAA submission.
As a next step the IT Department will investigate the use of puppet for more Automated IT Operations.
$ sudo apt-get install puppet
Puppet Labs website. (Accessed 02/05/2014).
Other, particular requirements: maintenance of older products and services from pre-existing projects requires that 10 Windows computers, on which legacy, proprietary software must keep running, remain visible from the internal network, but (unlike the Linux clients) have no access to the Internet.
As is described above the MS Windows Computers are corralled in their own OSPFv2 Area 20.0.0.0 which is filtered to only allow route sharing with the OSPFv2 Area 10.0.0.0. Additionally to the OSPFv2 Area filtering the MS Windows Computers will be assigned addresses from Request for Comment (RFC) 1918 - Address Allocation for Private Internets ranges. i.e. 172.16.1.2-254/24 and the ABR interface will have the gateway address 172.16.1.1. These addresses are routable internally but cannot be routed by the ISP. MS Windows Computers will not be assigned an IPv6 prefix in response to NDP requests and therefore do not have Global Scope IPv6 addresses.
Request for Comment (RFC) 1918 - Address Allocation for Private Internets. (Accessed 01/05/2014).
For connections to the MS Windows computers from Linux Clients, users are permitted access using the xfreerdp Remote Desktop Protocol (RDP) client application (it replaced rdesktop). It is part of the FreeRDP Project. The usage format is:
xfreerdp -u <username> -d <doamin name> -p <password> <Server name>.
Usage of freerdp is as follows:
  $ sudo apt-get install freerdp-x11

  $ xfreerdp -u diarmuid.obriain -d SBSDOMAIN.local -p MyWinPass sbsserver
A graphical GTK+ utility for Linux that implements freerdp is Remmina. It is also useful for grouping multiple protocol with plugins like:
Install Remmina as follows.
  $ sudo apt-get install remmina
  $ sudo apt-get install remmina-plugin-*
 |
FreeRDP website. (Accessed: 04/05/2014). Project
Remmina website. (Accessed: 04/05/2014).
Write a shell script that would perform an automatic installation of the distribution chosen in exercise 1 on a new laptop (for example when a laptop breaks and a new one must be purchased, and then automatically copies inside it the content of the $USER/work folder on the central file server.
The process of creating a Template of the Corporate OS image and using it to recover a failed client is well described earlier in this document with Clonezilla. Used in conjunction with the fta_backup.sh script is a workable mechanism for the recovery of a failed client computer.
fta_backup.sh is a script to backup or restore the home directory of a user to a server. It uses rsync over Secure Shell (ssh) to backup or restore the contents of the user home directory to the file server.
It is in two parts the script itself fta_backup.sh and a configuration file fta_backup.conf. The latter file contains necessary variables that will not change often or need to be established as defaults. The former establishes some variables, reads in the variables from the fta_backup.conf file and then assigns values to variables as determined by the option switches from the shell input. These give the program the local username to be backed up or recovered, the username and password of the user on the rsync server as well as a switch for verbose, help and a final switch that determines if this is a restore action rather than a backup. Logs are stored to the file defined by the $RSYNC_LOG variable.
Before using this make sure that the sshpass utility is installed.
$ sudo apt-get install sshpass
The script is placed in a hidden directory on the client laptop, by the itsupport.sh script above. When ran without the -x option switch it performs a backup of the home directory of dobriain to the server where the username backupuser and password backuppass is used. The Server itself is defined in the $RSYNC_SVR variable in the fta_backup.conf file.
  $ ./fta_backup.sh -h

  HELP
  ====

  NAME	fta_backup.sh

  The program fta_backup.sh reads in variables from fta_backup.conf.
  The following variables can be adjusted:
  RSYNC_SVR='<Server hostname or IP address>'
  RSYNC_SVR_DIR='<backup dir on rsync svr i.e. backup>'
  RSYNC_VERBOSE=<either 0, no verbose  |  1, verbose output>
  RSYNC_LOG_DIR=<Path to RSYNC Log file>

  EXAMPLES
  RSYNC_SVR='fta.obriain.com'
  RSYNC_SVR_DIR='project'
  RSYNC_VERBOSE=0
  RSYNC_LOG=/var/log/rsync.log

  fta_backup.sh also excepts options from the command line.

  -l	Local User
  -r	Remote User
  -p	Remote Password
  -v	rsync progress
  -x	Recover mode - recover from a previous backup
  -h	Help page

  EXAMPLES
  Backup:    fta_backup.sh -l dobriain -r backupuser -p backuppass -v
  Restore:   fta_backup.sh -l dobriain -r backupuser -p backuppass -v -x
  $ sudo fta_backup.sh -l dobriain -r backupuser -p backuppass -v


  Connecting to fta.obriain.com
  beginning ''dobriain'' backup to fta.obriain.com
  ''project'' directory exists on fta.obriain.com
  verbose output is enabled
  backup of /home/dobriain/ is now complete
Recovery of a backed up client is similar just with the addition of the -x switch.
  $ sudo fta_backup.sh -l dobriain -r backupuser -p backuppass -v -x

  Connecting to fta.obriain.com
  beginning ''dobriain'' restoration from fta.obriain.com
  verbose output is enabled
  recovery of /home/dobriain/ from fta.obriain.com is now complete
Search for files with names that match a pattern given as second parameter and a size larger than or equal to the value passed as the third parameter OR never accessed for a year.
i.e. `$ sel_old /home *mov 10000k`
Return all files from the /home directory that end with mov (e.g. movie mpeg4) and are larger than or equal to 10 MB. As indicated, it should be possible to use * as a wildcard in the file name. The shell script will save a log in /tmp/size.txt with information (accumulated and sorted by file size) of the files found including at least (one line per file) name, path, size, ownership, date.
The script will send an email to each current user that informs him that possibly obsolete files have been found, and inform him that these files will be archived on a network drive in 72 hours in a directory under /st_old/$USER, (not accessible any more).
After 72 hours, the files found earlier will be stored on that drive and the local copies on the server will be deleted. A short email will be sent to each user informing him that the earlier announced archive action has been performed (without file details now).
sel_old.sh
This script generates a list of files dependent upon having a start location, a filename, a minimum size. It generates three files. The /tmp/size.txt is a list of files found and is of the form <filename>, <path>, <file size>, <owner> and <file date> in a list with each line in the file dedicated to a found file. The /tmp/sleepusers.conf file is created with a list of file owners, again with a single line per owner. The /tmp/sleepfiles.conf is a second dormant file that contains a list of absolute path filenames. The sel_old.sh script also emails each owner warning them that their files have been selected by the IT Department for archiving and this will be carried out after a period of time (72 hours) in this case. There is a -h switch for help.
  $ ./sel_old.sh -h

  HELP
  ====

  NAME	sel_old.sh

  The program sel_old.sh searches for files with names that match a pattern,
  given as second parameter and a size larger than or equal to the value passed
  as the third parameter OR never accessed for a year.

  -h	Help page

  USAGE:		sel_old.sh <root directory> <file type> <file size>
  		<file size> is either a <number> or <number><size>
  		where <size> is k, M or G
  EXAMPLE:	sel_old.sh /home *mov 10000k


  NOTE:	k - Kilobytes (1024 bytes)
  	M - Megabytes (1048576 bytes)
  	G - Gigabytes (1073741824 bytes)
In this example the sel_old.sh script searches from the /home directory for Open Document Text (odt) that are greater that 1000 Kilobytes and more than a year old. I could have achieved the same result with 1M instead of 1000k.
  # ./sel_old.sh /home *odt 1000k

  Mail sent to dobriain with a list of files that will be archived in 72 hours.
  Mail sent to adoody with a list of files that will be archived in 72 hours.
  ''at'' command set to execute /usr/local/sbin/sel_old_email.sh in 72 hours.
Looking at the files in /tmp/
  $ ls /tmp/s*

  /tmp/size.txt  /tmp/sleepfiles.conf  /tmp/sleepusers.conf
size.txt
This file contains the files, path, file size, owner and the file date in a list. This is further analysed by the script and two further files are created that will lie dormant until the wait period (72 hours) has passed when they will be analysed by the sel_old_email.sh script.
  # cat /tmp/size.txt

  Modelling_assignment2_02Feb05.odt, /home/dobriain/Desktop/Networks/NetworkDesign, 22740, dobriain, 10-05-2008
  modelling2.odt, /home/dobriain/Desktop/Networks/NetworkDesign, 22741, dobriain, 10-05-2008
  Possion.odt, /home/dobriain/Desktop/Networks/NetworkDesign, 28846, dobriain, 10-05-2008
  NetworkAnalysisDesign2003Summer.odt, /home/dobriain/Desktop/Networks/NetworkDesign, 36525, dobriain, 10-05-2008
  ENG0017-Tower_Rescue_SOP.odt, /home/adoody/Desktop/HS/Safety_Docs, 38516, adoody, 31-12-2000
  NetworkAnalysisDesign2004Summer.odt, /home/dobriain/Desktop/Networks/NetworkDesign, 38909, dobriain, 10-05-2008
  Modelling_assignment2_10Feb05.odt, /home/dobriain/Desktop/Networks/NetworkDesign, 39670, dobriain, 10-05-2008
  ENG0019-Method_Statement_Template.odt, /home/adoody/Desktop/HS/Safety_Docs, 43344, adoody, 31-12-2000
  Modelling_assignment1_30Jan05.odt, /home/dobriain/Desktop/Networks/NetworkDesign, 146452, dobriain, 10-05-2008
  Modelling_assignment1_10Feb05.odt, /home/dobriain/Desktop/Networks/NetworkDesign, 146456, dobriain, 10-05-2008
  ENG0047-Restricted_Electrical_Works.odt, /home/adoody/Desktop/HS/Safety_Docs, 248791, adoody, 31-12-2000
  HR0003-Health_and_Welfare_Statement.odt, /home/adoody/Desktop/HS/Safety_Docs, 468736, adoody, 31-12-2000
  Assignment2_v2.odt, /home/dobriain/Desktop/Networks/NetworkDesign, 493955, dobriain, 10-05-2008
  ENG0018-Field_Operations_Guidelines.odt, /home/adoody/Desktop/HS/Safety_Docs, 1126095, adoody, 31-12-2000
  Modelling_assignment3_Simulation_29Sept08.odt, /home/dobriain/Desktop/Networks/NetworkDesign, 2222662, dobriain, 10-05-2008
sleepusers.conf
This file contains a list of file owners to be contacted again once a period has expired (72 hours) by the sel_old_email.sh script.
  # cat /tmp/sleepusers.conf

  dobriain
  adoody
sleepfiles.conf
This file contains the absolute filenames that will be archived by the sel_old_email.sh script once the wait period has expired (72 hours).
  # cat /tmp/sleepfiles.conf

  /home/dobriain/Desktop/Networks/NetworkDesign/Modelling_assignment2_02Feb05.odt
  /home/dobriain/Desktop/Networks/NetworkDesign/modelling2.odt
  /home/dobriain/Desktop/Networks/NetworkDesign/Possion.odt
  /home/dobriain/Desktop/Networks/NetworkDesign/NetworkAnalysisDesign2003Summer.odt
  /home/dobriain/Desktop/Networks/NetworkDesign/NetworkAnalysisDesign2004Summer.odt
  /home/dobriain/Desktop/Networks/NetworkDesign/Modelling_assignment2_10Feb05.odt
  /home/dobriain/Desktop/Networks/NetworkDesign/Modelling_assignment1_30Jan05.odt
  /home/dobriain/Desktop/Networks/NetworkDesign/Modelling_assignment1_10Feb05.odt
  /home/dobriain/Desktop/Networks/NetworkDesign/Assignment2_v2.odt
  /home/dobriain/Desktop/Networks/NetworkDesign/Modelling_assignment3_Simulation_29Sept08.odt
  /home/adoody/Desktop/HS/Safety_Docs/ENG0017-Tower_Rescue_SOP.odt
  /home/adoody/Desktop/HS/Safety_Docs/ENG0019-Method_Statement_Template.odt
  /home/adoody/Desktop/HS/Safety_Docs/ENG0047-Restricted_Electrical_Works.odt
  /home/adoody/Desktop/HS/Safety_Docs/HR0003-Health_and_Welfare_Statement.odt
  /home/adoody/Desktop/HS/Safety_Docs/ENG0018-Field_Operations_Guidelines.odt
After the wait period (72 hours) the at command at the end of sel_old.sh calls sel_old_email.sh. This script reads in the list of users from the dormant file sleepusers.conf and emails them that the archive warning given previously is now being acted upon. It also reads in the dormant file sleepfiles.conf and moves them to the archive directory /st_old. Here you can see the file ran manually for information, however in reality this is called by the system at the defined time interval (72 hours) in the sel_old.sh script.
  # ./sel_old_email.sh

  Sending final mail to dobriain with regard to the archive.

  Sending final mail to adoody with regard to the archive.

  Moving /home/dobriain/Desktop/Networks/NetworkDesign/Modelling_assignment2_02Feb05.odt to /st_old/dobriain/Desktop/Networks/NetworkDesign/
  Moving /home/dobriain/Desktop/Networks/NetworkDesign/modelling2.odt to /st_old/dobriain/Desktop/Networks/NetworkDesign/
  Moving /home/dobriain/Desktop/Networks/NetworkDesign/Possion.odt to /st_old/dobriain/Desktop/Networks/NetworkDesign/
  Moving /home/dobriain/Desktop/Networks/NetworkDesign/NetworkAnalysisDesign2003Summer.odt to /st_old/dobriain/Desktop/Networks/NetworkDesign/
  Moving /home/dobriain/Desktop/Networks/NetworkDesign/NetworkAnalysisDesign2004Summer.odt to /st_old/dobriain/Desktop/Networks/NetworkDesign/
  Moving /home/dobriain/Desktop/Networks/NetworkDesign/Modelling_assignment2_10Feb05.odt to /st_old/dobriain/Desktop/Networks/NetworkDesign/
  Moving /home/dobriain/Desktop/Networks/NetworkDesign/Modelling_assignment1_30Jan05.odt to /st_old/dobriain/Desktop/Networks/NetworkDesign/
  Moving /home/dobriain/Desktop/Networks/NetworkDesign/Modelling_assignment1_10Feb05.odt to /st_old/dobriain/Desktop/Networks/NetworkDesign/
  Moving /home/dobriain/Desktop/Networks/NetworkDesign/Assignment2_v2.odt to /st_old/dobriain/Desktop/Networks/NetworkDesign/
  Moving /home/dobriain/Desktop/Networks/NetworkDesign/Modelling_assignment3_Simulation_29Sept08.odt to /st_old/dobriain/Desktop/Networks/NetworkDesign/
  Moving /home/adoody/Desktop/HS/Safety_Docs/ENG0017-Tower_Rescue_SOP.odt to /st_old/adoody/Desktop/HS/Safety_Docs/
  Moving /home/adoody/Desktop/HS/Safety_Docs/ENG0019-Method_Statement_Template.odt to /st_old/adoody/Desktop/HS/Safety_Docs/
  Moving /home/adoody/Desktop/HS/Safety_Docs/ENG0047-Restricted_Electrical_Works.odt to /st_old/adoody/Desktop/HS/Safety_Docs/
  Moving /home/adoody/Desktop/HS/Safety_Docs/HR0003-Health_and_Welfare_Statement.odt to /st_old/adoody/Desktop/HS/Safety_Docs/
  Moving /home/adoody/Desktop/HS/Safety_Docs/ENG0018-Field_Operations_Guidelines.odt to /st_old/adoody/Desktop/HS/Safety_Docs/

  Removing size.txt and the dormant files sleepusers.conf and sleepfiles.conf.
Cooper, M. (2014). Advanced Bash-Scripting Guide. Revision 10.
Frazier, M. (2010). Bash Associative Arrays.
Sasilala. (2010). The Ultimate Bash Array Tutorial with 15 Examples.
Frazier, M. (2008). Bash Regular Expressions.
Garrels, M. (2008). Bash Guide for Beginners. Version 1.11.
Richardson, L. (2005). Text Manipulation with sed.
  #!/bin/bash

  # // itsupport.sh - script to setup the itsupport user and directory on a new client //

  # Diarmuid O'Briain <diarmuid@obriain.com>

  # -----------

  # // Initialise some variables //

  FILENAME='itsupport.sh'
  RSYNC_SVR='fta.obriain.com'
  SP_USER='itsupport'
  SP_PASS='1tpa55wd'
  LOCAL_PASS='tem66a55'
  HIDDEN_DIR='.itsupportfiles'
  MY_UNAME=`whoami`

  # // Create ''helpf'' function //

  function helpf {
        echo -e "\nHELP\n====\n\nNAME\t$FILENAME\n"
        echo -e "The program $FILENAME reads in variables from the command line options."
        echo -e "\n-l\tLocal User\n-r\tRemote User\n-p\tRemote Password"
        echo -e "-h\tHelp page\n"
        echo -e "\nEXAMPLE:\t$FILENAME -l dobriain -r backupuser -p backuppass\n"
        exit 1
  }

  while getopts "hl:r:p:" FLAG

  do
     if [ $FLAG = 'h' ]
     then
        helpf
     elif [ $FLAG = 'l' ]
     then
        LOCAL_USER=$OPTARG
        # echo -e "LOCAL_USER is $OPTARG"
     elif [ $FLAG = 'r' ]
     then
        RSYNC_USER=$OPTARG
        # echo -e "RSYNC_USER is $OPTARG"
     elif [ $FLAG = 'p' ]
     then
        RSYNC_PASS=$OPTARG
        # echo -e "RSYNC_PASS is $OPTARG"
     fi
  done

  # // If all three key option variables are not set, exit script with the help page //

  if [ -z "$LOCAL_USER" ] || [ -z "$RSYNC_USER" ] || [ -z "$RSYNC_PASS" ]
  then
     helpf
  fi

  # // Determine of the $LOCAL_USER already exists

  HOME_DIR=NIL

  for i in $( ls /home )
  do
     if [ $i = $MY_UNAME ]
     then
        HOME_DIR=$i
     fi
  done

  if [ $LOCAL_USER = $MY_UNAME ] && [ $LOCAL_USER = $HOME_DIR ]
  then
     echo "''$LOCAL_USER'' already exists, skipping user creation"
  elif [ $LOCAL_USER = $MY_UNAME ] && [ ! $LOCAL_USER = $HOME_DIR ]
  then
     echo "''$LOCAL_USER'' already exists but does not have a home directory, their could a problem and manual intervention maybe necessary"
     exit 1
  elif [ ! $LOCAL_USER = $MY_UNAME ] && [ $LOCAL_USER = $HOME_DIR ]
  then
     echo "''$LOCAL_USER'' doesn't exist but a home directory does, their could a problem and manual intervention maybe necessary"
     exit 1
  else
     echo "Creating user $LOCAL_USER"
     echo "useradd -m $LOCAL_USER"
     useradd -m -s /bin/bash $LOCAL_USER
     echo "$LOCAL_USER:$LOCAL_PASS" | chpasswd

  fi

  # // Create an IT Support user on the client machine //

  SP_DIR=NIL

  for i in $( ls /home )
  do
     if [ $i = $SP_USER ]
     then
        SP_DIR=$i
     fi
  done

  if [ `grep -w "^$SP_USER" /etc/passwd` ] && [ $SP_USER = $SP_DIR ]
  then
    echo "''$SP_USER'' already exists skipping user creation"
  elif [ `grep -w "^$SP_USER" /etc/passwd` ] && [ ! $SP_USER = $SP_DIR ]
     then
        echo -e "''$SP_USER'' exists but does not have a home directory, their could a problem and manual intervention maybe necessary"
        exit 1
  elif [ ! `grep -w "^$SP_USER" /etc/passwd` ] && [ $SP_USER = $SP_DIR ]
  then
     echo -e "''$SP_USER'' doesn't exist but a home directory does, their could a problem and manual intervention maybe necessary"
  else
     echo "Creating user $SP_USER"
     echo "useradd -m $SP_USER"
     useradd -m -s /bin/bash $SP_USER
     echo "$SP_USER:$SP_PASS" | chpasswd
     SP_DIR=$SP_USER
  fi

  # // Create itsupport directory //

  if [ -d /home/$SP_DIR/$HIDDEN_DIR ]
  then
     echo "/home/$SP_DIR/$HIDDEN_DIR already exists"
  else
     echo "Creating directory /home/$SP_DIR/$HIDDEN_DIR"
     mkdir /home/$SP_DIR/$HIDDEN_DIR
  fi

  # // Use sftp to download the IT Support files to the ''.itsupport directory //

  sshpass -p $RSYNC_PASS sftp $RSYNC_USER@$RSYNC_SVR << SFTPF
     cd itsupport
     lcd /home/$SP_DIR/$HIDDEN_DIR/
     get *
     bye

  SFTPF

  # // Change ownership and permissions of the .itsupport directory //

  chown -R $SP_USER:$SP_USER /home/$SP_DIR/$HIDDEN_DIR
  chmod -R 600 /home/$SP_DIR/$HIDDEN_DIR
  chmod 700 /home/$SP_DIR/$HIDDEN_DIR/*.sh

  # // Add the IT Support user to the /etc/group sudo users list //

  if [ `grep -E "^sudo:x:[0-9]{1,4}:.*$SP_USER$" /etc/group` ]
  then
     echo "User ''$SP_USER'' already in the /etc/group sudo group users list"
  elif [ `grep -E '^sudo:x:[0-9]{1,4}:$' /etc/group` ]
  then
     echo "Adding ''$SP_USER'' to the /etc/group sudo group users list"
     sed -ie "s/^sudo.*$/&$SP_USER/g" /etc/group
  elif [ `grep -E '^sudo:x:[0-9]{1,4}:[A-Za-z]*$' /etc/group` ]
  then
     echo "Adding ''$SP_USER'' to the /etc/group sudo group users list, note there is another user in the list"
     sed -ie "s/^sudo.*$/&,$SP_USER/g" /etc/group
  else
     echo -e "Manual intervention necessary, ''/etc/group'' file possibly corrupt"
  fi

  # // End of program //

  exit 0
  #!/bin/bash

  # // fta_backup.sh - fta_backup script for GNU/Linux home directories //
  # // Backup or Recovery (x) of a user directory to remote server project directory //

  # Diarmuid O'Briain <diarmuid@obriain.com>

  # -----------

  # // Initialise some variables //

  FILENAME='fta_backup.sh'
  CONF_FILE='fta_backup.conf'
  RSYNC_RECOVER=0
  TIMESTAMP=`date`

  # // Read in the backup.conf file //

  . $CONF_FILE

  # // Create ''helpf'' function //

  function helpf {
        echo -e "\nHELP\n====\n\nNAME\t$FILENAME\n"
        echo -e "The program $FILENAME reads in variables from $CONF_FILE."
        echo -e "The following variables can be adjusted:"
        echo -e "RSYNC_SVR='<Server hostname or IP address>'"
        echo -e "RSYNC_SVR_DIR='<backup dir on rsync svr i.e. backup>'"
        echo -e "RSYNC_VERBOSE=<either 0, no verbose  |  1, verbose output>"
        echo -e "RSYNC_LOG_DIR=<Path to RSYNC Log file>"
        echo -e "\nEXAMPLES\nRSYNC_SVR='fta.obriain.com'"
        echo -e "RSYNC_SVR_DIR='project'"
        echo -e "RSYNC_VERBOSE=0"
        echo -e "RSYNC_LOG=/var/log/rsync.log"
        echo -e "\n$FILENAME also excepts options from the command line."
        echo -e "\n-l\tLocal User\n-r\tRemote User\n-p\tRemote Password"
        echo -e "-v\trsync progress\n-x\tRecover mode - recover from a previous backup\n-h\tHelp page\n"
        echo -e "\nEXAMPLES\nBackup:    $FILENAME -l dobriain -r backupuser -p backuppass -v"
        echo -e "Restore:   $FILENAME -l dobriain -r backupuser -p backuppass -v -x\n"
        exit 1
  }

  # // Write timestamp to rsync.log //

  echo -e "$TIMESTAMP\n" >> $RSYNC_LOG

  # // Get opion values from commandline and assign them to local variables //

  while getopts "hl:r:p:vx" FLAG

  do
     if [ $FLAG = 'h' ]
     then
        helpf
     elif [ $FLAG = 'l' ]
     then
        LOCAL_USER=$OPTARG
        # echo -e "LOCAL_USER is $OPTARG"
     elif [ $FLAG = 'r' ]
     then
        RSYNC_USER=$OPTARG
        # echo -e "RSYNC_USER is $OPTARG"
     elif [ $FLAG = 'p' ]
     then
        RSYNC_PASS=$OPTARG
        # echo -e "RSYNC_PASS is $OPTARG"
     elif [ $FLAG = 'v' ]
     then
        RSYNC_VERBOSE=1
     elif [ $FLAG = 'x' ]
     then
        RSYNC_RECOVER=1
     fi
  done

  # // If all three key option variables are not set, exit script with the help page //

  if [ -z "$LOCAL_USER" ] || [ -z "$RSYNC_USER" ] || [ -z "$RSYNC_PASS" ]
  then
     helpf
  fi

  # // Test that the server is up, if not warn and exit the script //

  if [ `ping -c 1 $RSYNC_SVR > /dev/null ; echo $?` != 0 ]
  then
     echo -e "The rsync server $RSYNC_SVR is not online"
     exit 1
  else
     echo -e "Connecting to $RSYNC_SVR"
  fi

  # // Test the home user directory exists, inform the user if it doesn't exist. //

  if [ $RSYNC_RECOVER -eq 0 ]
  then
     if [ ! -d /home/$LOCAL_USER ]
     then
        echo "there is no /home/$LOCAL_USER directory for ''$LOCAL_USER'' here to backup, sorry !!"
        exit 1
     else
        echo "beginning ''$LOCAL_USER'' backup to $RSYNC_SVR"
     fi
  fi

  # // Test the directory, if it doesn't exist create it, or //
  # // in recovery mode (x) inform the user if a backup doesnt exist. //

  if [ $RSYNC_RECOVER -eq 0 ]
  then
     if sshpass -p $RSYNC_PASS ssh -o StrictHostKeyChecking=no \
           $RSYNC_USER@$RSYNC_SVR "[ ! -d /home/$RSYNC_USER/$RSYNC_SVR_DIR ]"
     then
        echo "no ''$RSYNC_SVR_DIR'' directory exists on $RSYNC_SVR"
        echo "creating ''$RSYNC_SVR_DIR'' directory on $RSYNC_SVR"
        sshpass -p $RSYNC_PASS ssh -o StrictHostKeyChecking=no \
           $RSYNC_USER@$RSYNC_SVR "mkdir -p /home/$RSYNC_USER/$RSYNC_SVR_DIR"
     else
        echo "''$RSYNC_SVR_DIR'' directory exists on $RSYNC_SVR"
     fi
  else
     if sshpass -p $RSYNC_PASS ssh -o StrictHostKeyChecking=no \
           $RSYNC_USER@$RSYNC_SVR "[ ! -d /home/$RSYNC_USER/$RSYNC_SVR_DIR ]"
     then
        echo "no backup for ''$LOCAL_USER'' exists on $RSYNC_SVR, sorry !!"
        exit 1
     else
        echo "beginning ''$LOCAL_USER'' restoration from $RSYNC_SVR"
     fi
  fi

  # // Execute the rsync to incrementally update the copy on the server or recover from the server //

  if [ $RSYNC_RECOVER -eq 0 ]
  then
     if [ $RSYNC_VERBOSE -eq 1 ]
     then
        echo -e "verbose output is enabled"
        sshpass -p $RSYNC_PASS rsync -arvz --delete --progress \
           /home/$LOCAL_USER/ \
           -e ssh $RSYNC_USER@$RSYNC_SVR:/home/$RSYNC_USER/$RSYNC_SVR_DIR/$LOCAL_USER/ \
           >> $RSYNC_LOG
        echo -e "backup of /home/$LOCAL_USER/ is now complete\n" | tee -a $RSYNC_LOG
     else
        sshpass -p $RSYNC_PASS rsync -arqz --delete --progress \
           /home/$LOCAL_USER/ \
           -e ssh $RSYNC_USER@$RSYNC_SVR:/home/$RSYNC_USER/$RSYNC_SVR_DIR/$LOCAL_USER/ \
           >> $RSYNC_LOG
        echo -e "backup of /home/$LOCAL_USER/ is now complete\n" | tee -a $RSYNC_LOG
     fi
  else
     if [ $RSYNC_VERBOSE -eq 1 ]
     then
        echo -e "verbose output is enabled"
        sshpass -p $RSYNC_PASS rsync -arvz --delete --progress  \
           -e ssh $RSYNC_USER@$RSYNC_SVR:/home/$RSYNC_USER/$RSYNC_SVR_DIR/$LOCAL_USER/ \
           /home/$LOCAL_USER/ \
           >> $RSYNC_LOG
        chown -R $LOCAL_USER:$LOCAL_USER /home/$LOCAL_USER
        echo -e "recovery of /home/$LOCAL_USER/ from $RSYNC_SVR is now complete\n" \
                 | tee -a $RSYNC_LOG
     else
        sshpass -p $RSYNC_PASS rsync -arqz --delete \
           -e ssh $RSYNC_USER@$RSYNC_SVR:/home/$RSYNC_USER/$RSYNC_SVR_DIR/$LOCAL_USER/ \
           /home/$LOCAL_USER/ \
           >> $RSYNC_LOG
        chown -R $LOCAL_USER:$LOCAL_USER /home/$LOCAL_USER
        echo -e "recovery of /home/$LOCAL_USER/ from $RSYNC_SVR is now complete\n" \
                | tee -a $RSYNC_LOG
     fi
  fi

  # Write end line in logfile

  NUM=48
  eval printf '%.0s-' {1..$NUM} >> $RSYNC_LOG
  echo -e "\n" >> $RSYNC_LOG

  # // End of program //

  exit 0
  # // new_backup.conf file //

  # This file feeds variables to the file backup.sh

  # RSYNC_SVR='<Server hostname or IP address>'
  # RSYNC_SVR_DIR='<backup dir on rsync svr i.e. backup>'
  # RSYNC_VERBOSE=<0 | 1>
  # RSYNC_LOG_DIR=<Path to RSYNC Log file>

  RSYNC_SVR='fta.obriain.com'
  RSYNC_SVR_DIR='project'
  RSYNC_VERBOSE=0
  RSYNC_LOG=/var/log/rsync.log
  #!/bin/bash

  # // ms_convert.sh - script to mass convert MS Office files to OpenDocument format  //

  # Diarmuid O'Briain <diarmuid@obriain.com>

  # -----------

  # // Initialise some variables //

  FILENAME='ms_converter.sh'
  PROJ_DIR=/project
  TIMESTAMP=`date`
  LOG_FILE=$PROJ_DIR/ms_convert.log

  # // Write timestamp to ms_convert.log //

  echo -e "$TIMESTAMP\n" >> $LOG_FILE

  # // Create ''helpf'' function //

  function helpf {
        echo -e "\nHELP\n====\n\nNAME\t$FILENAME\n"
        echo -e "The program $FILENAME mass converts MS Office documents to OpenDocument Format."
        echo -e "It also creates an archive of the original MS Office files."
        echo -e "\n-h\tHelp page"
        echo -e "-d\tRoot directory for conversion (if not the detault /project)\n"
        echo -e "USAGE:\t\t$FILENAME -d <Root directory>"
        echo -e "EXAMPLE:\t$FILENAME -d /project\n\n"
        exit 1
  }

  while getopts "d:h" FLAG

  do
     if [ $FLAG = 'h' ]
     then
        helpf
     elif [ $FLAG = 'd' ]
     then
        PROJ_DIR=$OPTARG
        # echo -e "PROJ_DIR is $OPTARG"
     fi
  done

  # // Copy the Microsoft Office files to an MS_ARCHIVE directory and preserve the directory structure //

  echo "Creating archive of the MS Office original files"
  mkdir $PROJ_DIR/MS_ARCHIVE/
  find $PROJ_DIR -name \*.doc* -o -name \*.ppt* -o -name \*.xls* | cpio -pdm  $PROJ_DIR/MS_ARCHIVE/ > /dev/null 2>&1

  # // Create an archive file containing the Microsoft original files //

  mv $PROJ_DIR/MS_ARCHIVE$PROJ_DIR/* $PROJ_DIR/MS_ARCHIVE/
  rm -r $PROJ_DIR/MS_ARCHIVE/home
  tar -C $PROJ_DIR/MS_ARCHIVE/ -cjvf $PROJ_DIR/ms_archive.tar.bz2 ./* > /dev/null 2>&1
  rm -r $PROJ_DIR/MS_ARCHIVE
  echo -e "Completed archive of the MS Office original files as $PROJ_DIR/ms_archive.tar.bz2\n..."

  # // Convert MS Office files to OpenDocument Format //

  for i in $( find $PROJ_DIR -name \*.doc* -o -name \*.ppt* -o -name \*.xls* )
  do
     if [[ $i == *.doc* ]]
     then
        echo "Converting $i to .odt format" | tee -a  $LOG_FILE
        unoconv --format odt $i &> /dev/null
        rm $i
     elif [[ $i == *.ppt* ]]
     then
        echo "Converting $i to .odp format" | tee -a  $LOG_FILE
        unoconv --format odp $i &> /dev/null
        rm $i
     elif [[ $i == *.xls* ]]
     then
        echo "Converting $i to .odt format" | tee -a  $LOG_FILE
        unoconv --format ods $i &> /dev/null
        rm $i
     fi
  done

  # Write end line in logfile

  echo -e "...\nConversion of MS Office files to ODF format is complete."
  echo "An archive of the original files is stored as $PROJ_DIR/ms_archive.tar.bz2." \
       | tee -a  $LOG_FILE
  echo

  NUM=48
  echo -e "\n" >> $LOG_FILE
  eval printf '%.0s-' {1..$NUM} >> $LOG_FILE
  echo -e "\n" >> $LOG_FILE

  # // End of program //

  exit 0
  #!/bin/bash

  # // sel_old.sh - Pattern match files based on access and age.  //

  # Diarmuid O'Briain <diarmuid@obriain.com>

  # -----------

  # // Initialise some variables //

  FILENAME='sel_old.sh'
  TIMESTAMP=`date`
  LOG_DIR=/tmp
  LOG_FILE=$LOG_DIR/size.txt
  EMAIL_MSG="$LOG_DIR/emailmsg.txt"
  SLEEP_SCRIPT="$LOG_DIR/sleepscript.sh"
  SLEEP_USERS="$LOG_DIR/sleepusers.conf"
  SLEEP_FILES="$LOG_DIR/sleepfiles.conf"
  SEL_OLD_EMAIL="/usr/local/sbin/sel_old_email.sh"
  ARC_HOURS=72
  ACC_TIME=365
  USER=''

  # // Create ''helpf'' function //

  function helpf {
        echo -e "\nHELP\n====\n\nNAME\t$FILENAME\n"
        echo "The program $FILENAME searches for files with names that match a pattern,"
        echo "given as second parameter and a size larger than or equal to the value passed"
        echo "as the third parameter OR never accessed for a year."
        echo -e "\n-h\tHelp page\n"
        echo -e "USAGE:\t\t$FILENAME <root directory> <file type> <file size>"
        echo -e "\t\t<file size> is either a <number> or <number><size>"
        echo -e "\t\twhere <size> is k, M or G"
        echo -e "EXAMPLE:\t$FILENAME /home *mov 10000k\n\n"
        echo -e "\nNOTE:\tk - Kilobytes (1024 bytes)"
        echo -e "\tM - Megabytes (1048576 bytes)"
        echo -e "\tG - Gigabytes (1073741824 bytes)\n\n"

        exit 1
  }

  while getopts "h" FLAG
  do
     if [ $FLAG = 'h' ]
     then
        helpf
        exit 1
     fi
  done

  # // Assign commandline inputs to variables //

  if [ ! $1 ]
  then
     helpf
     exit 1
  else
     ROOT_DIR=$1
  fi

  if [ ! $2 ]
  then
     helpf
     exit 1
  elif [[ ! $2 =~ [A-Za-z0-9_]* ]]
  then
     echo "Root path to search start."
     exit 1
  else
     FILE_RE=$2
  fi

  if [ ! $3 ]
  then
     helpf
     exit 1
  elif [[ $3 =~ \d* ]] || [[ $3 =~ \d*[kMG] ]]
  then
     FILE_SIZE=$3
  else
     echo "Size format is <number> or <number><size> where <number> is digits and <size> is k, M or G."
     exit 1
  fi

  # // Check logfile exists //

  if [ ! -f "$LOG_FILE" ]
  then
     if [ ! -d "$LOG_DIR" ]
     then
        echo "No $LOG_DIR, creating now"
        mkdir -p $LOG_DIR
     fi
     echo "No $LOG_FILE, creating now"
     touch "$LOG_FILE"
  fi

  # // Find files that match the pattern given on the command line //

  find "$ROOT_DIR" -name "$FILE_RE" -size +"$FILE_SIZE" -atime +"$ACC_TIME" -type f \
       -printf "%f, %h, %s, %u, %Td-%Tm-%TY\n" |sort -b -k3n > $LOG_FILE

  # // Populate main ARRAY() with contents of $LOG_FILE //

  ARRAY=()
  declare -A FILE_OWNERS

  while read LINE
  do
      ARRAY+=("$LINE")
  done < $LOG_FILE

  # // Going through each line in ARRAY() cut the seperate elements //
  # // and assign them to variables.                                //

  for i in "${ARRAY[@]}"
  do
     i=$(echo $i | sed 's/, /,/g')
     FILE_NAME=$(echo $i | cut -d, -f1)
     DIR_NAME=$(echo $i | cut -d , -f2)
     FILE_SIZE=$(echo $i | cut -d , -f3)
     FILE_OWNER=$(echo $i | cut -d , -f4)
     FILE_AGE=$(echo $i | cut -d , -f5)

     # // Create a FILE_OWNERS() array //

     if [[ ${#FILE_OWNERS[0]} -eq 0 ]]
     then
        FILE_OWNERS[${#FILE_OWNERS[@]}]=$FILE_OWNER
     else
        if [[ ! $(printf "%s\n" "${FILE_OWNERS[@]}" | grep "^${FILE_OWNER}$") ]]
       then
          FILE_OWNERS[${#FILE_OWNERS[@]}]=$FILE_OWNER
       fi
     fi

     # // Add lines for each owner to their individual arrays //

     eval $(echo "$FILE_OWNER[\${#$FILE_OWNER[@]}]='$DIR_NAME/$FILE_NAME'")

  done

  # // Send e-mails to the users and creates a sleep configuration file //

  echo > $EMAIL_MSG

  for USER in "${FILE_OWNERS[@]}"
  do
     touch "$SLEEP_FILES"
     SUBJECT="IT Department - File Archive notice"
     echo -e "\nXYZ Limited - IT Department Notice\n\nDear $USER\n" >> $EMAIL_MSG
     echo "IT Department maintainance has shown that you have possibly obsolete files on the server." >> $EMAIL_MSG
     echo "These files will be archived on a network drive $ARC_HOURS hours from now in a directory under" >> $EMAIL_MSG
     echo -e "/st_old/$USER.\n" >> $EMAIL_MSG
     echo "These files will no longer be accessible and are archived for business due diligence reasons." >> $EMAIL_MSG
     echo -e "\nThe files in question are:\n" >> $EMAIL_MSG
     eval "printf \"%s\\n\" \"\${$USER[@]}\"" >> $EMAIL_MSG
     eval "printf \"%s\\n\" \"\${$USER[@]}\"" >> "${SLEEP_FILES}"
     echo -e "\nThe IT Department\nHELP Desk at (061) 555 555\n" >> $EMAIL_MSG
     /bin/mail -s "$SUBJECT" "$USER" < $EMAIL_MSG
     echo -e "Mail sent to $USER with a list of files that will be archived in $ARC_HOURS hours."
     rm $EMAIL_MSG
  done

  printf "%s\n" "${FILE_OWNERS[@]}"  > $SLEEP_USERS

  # // Execute an 'at' command to execute the $SEL_OLD_EMAIL in $ARC_HOURS hours //

  /usr/bin/at now +72 hours -f $SEL_OLD_EMAIL
  echo "''at'' command set to execute $SEL_OLD_EMAIL in $ARC_HOURS hours."

  # // End of program //

  exit 0
  #!/bin/bash

  # // sel_old_email.sh - Sends mail for sel_old.sh.  //

  # Diarmuid O'Briain <diarmuid@obriain.com>

  # -----------

  # // Initialise some variables //

  FILENAME='sel_old_email.sh'
  LOG_DIR=/tmp
  SLEEP_USERS="$LOG_DIR/sleepusers.conf"
  SLEEP_FILES="$LOG_DIR/sleepfiles"
  EMAIL_MSG="$LOG_DIR/emailmsg.txt"
  ARC_HOURS=72
  ARC_ROOT="/st_old"
  SUBJECT="File archiving"

  # //Read in sleepusers.conf file and send final email to each //

  ARRAY=($( < $SLEEP_USERS ))

  for USER in "${ARRAY[@]}"
  do
     echo -e "Sending final mail to $USER with regard to the archive.\n"
     SUBJECT="IT Department - File Archive final notice"
     echo -e "\nXYZ Limited - IT Department Notice\n\nDear $USER\n" > $EMAIL_MSG
     echo "The IT Department maintainance notified to you $ARC_HOURS hours ago is now complete." >> $EMAIL_MSG
     echo -e "\nThe IT Department\nHELP Desk at (061) 555 555\n" >> $EMAIL_MSG
     /bin/mail -s "$SUBJECT" "$USER" < $EMAIL_MSG
     # echo "/bin/mail -s $SUBJECT $USER"; cat $EMAIL_MSG
     rm $EMAIL_MSG
  done

  # //Read in sleepfiles conf and move files to $ARC_ROOT  //

  FILES_ARRAY=($( < ${SLEEP_FILES}.conf ))

  for FILE in "${FILES_ARRAY[@]}"
  do
     ARC_DIR_NAME=$(echo $FILE | sed -e 's_[^/]*$__' | sed 's/^\/home//g')
     mkdir -p "${ARC_ROOT}${ARC_DIR_NAME}"
     echo "Moving $FILE to ${ARC_ROOT}${ARC_DIR_NAME}"
     mv "$FILE ${ARC_ROOT}${ARC_DIR_NAME}"
  done

  # // Remove the dormant files //

  echo -e "\nRemoving size.txt and the dormant files sleepusers.conf and sleepfiles.conf.\n"

  rm /tmp/size.txt
  rm /tmp/sleepfiles.conf
  rm /tmp/sleepusers.conf

  # // End of program //

  exit 0
This section includes work I was trialling and decided either to stop due to time constraints or I decided to go another direction.
$ sudo apt-get install slapd ldap-utils
Uncomment the BASE and URI lines in the ldap.conf file and replace example with the domain.
  $ sudo vi /etc/ldap/ldap.conf

  BASE    dc=example,dc=com
  URI     ldap://ldap.example.com ldap://ldap-master.example.com:666
becomes:
  BASE    dc=obriain,dc=com
  URI     ldap://ldap.obriain.com ldap://ldap-master.obriain.com:666
Rerun the OpenLDAP package configuration. Select the Hierarchical DataBase (HDB) rather than the Berkeley DataBase (BDB) as they are much the same with the former making use of indexing and caching to speed data access.
$ sudo dpkg-reconfigure slapd
To test the LDAP server, Use the ldapsearch -x command to test the new LDAP Server.
$ ldapsearch -x
Install phpLDAPadmin.
  $ sudo apt-get install apache2 php5 php5-mysql

  $ sudo apt-get install phpldapmyadmin
Edit the pphLDAPadmin configuration file.
  $ sudo vi /etc/phpldapadmin/config.php

  $servers = new Datastore();
  $servers->newServer('ldap_pla');
  $servers->setValue('server','name','fta.obriain.com LDAP Server');
  $servers->setValue('server','host','127.0.0.1');
  $servers->setValue('server','base',array('dc=fta,dc=obriain,dc=com'));
  $servers->setValue('login','bind_id','cn=admin,dc=fta,dc=obriain,dc=com');
OpenLDAP Webpage. (Accessed: 27/04/2014).
phpLDAPadmin Webpage. (Accessed: 27/04/2014).
Citadel Groupware deals with the requirements of e-Mail, Calendar services, Contacts, Notes and Tasks.
Add the Citadel groupware repository to the sources.list
  $ sudo echo -e "\n# Citadel repository\ndeb http://debian.citadel.org/debian/ wheezy main\n" >> /etc/apt/sources.list

  $ sudo apt-get update
Install Spamassassin and amavisd content filter for e-mail.
$ sudo apt-get install citadel-suite spamassassin amavisd-new
Install the Citadel groupware.
  $ sudo apt-get install apache2
  $ sudo apt-get install citadel-suite
Answer questions answered as follows:
Note: Ports 8080 and 4343 are used so as not to clash with Apache2, installed for owncloud.
Enable spamd.
  $ sudo vi /etc/default/spamassassin
  # Change to one to enable spamd
  ENABLED=1
Start the spamassassin service.
  $ sudo /etc/init.d/spamassassin start
  Starting SpamAssassin Mail Filter Daemon: spamd.
  $ sudo -s

  # mkdir /etc/ssl/citadel/backup
  # mv /etc/ssl/citadel* /etc/ssl/citadel/backup/
  # openssl x509 -req -days 365 -in citadel.csr -signkey citadel.key -out citadel.cer

  Country Name (2 letter code) [AU]: IE
  State or Province Name (full name) [Some-State]: Munster
  Locality Name (eg, city) []: Limerick
  Organization Name (eg, company) [Internet Widgits Pty Ltd]: obriain.com
  Organizational Unit Name (eg, section) []: fta
  Common Name (e.g. server FQDN or YOUR name) []: fta.obriain.com
  Email Address []: diarmuid@obriain.com

  Please enter the following 'extra' attributes
  to be sent with your certificate request
  A challenge password []:
  An optional company name []:

  # chmod 600 citadel.key
Create a self-signed certificate and copy required files to the webcit directory.
  # openssl x509 -req -days 365 -in citadel.csr -signkey citadel.key -out citadel.cer

  Getting Private key
Copy citadel.cer, citadel.csr and citadel.key to the webcit directory.
# cp -a citadel* /etc/ssl/webcit/
Customise the Citadel server login banner.
  # echo -e "Welcome to Citadel for fta.obriain.com\n" >> /etc/citadel/messages/hello
  # chown citadel:citadel /etc/citadel/messages/hello
  # exit
  $ sudo /etc/init.d/citadel restart
  [ ok ] Restarting Citadel Groupware : citserver.
  $ sudo /etc/init.d/webcit restart
  [ ok ] Restarting Citadel Groupware Webserver : webcit.
Browse to https://<server hostname or IP address>:4343
 |
Citadel Groupware Server. (Accessed: 25/04/2014).
Citadel documentation. (Accessed: 25/04/2014).
Spamassassin documentation. (Accessed: 25/04/2014).
Paradis, P. (2011). Email with Citadel on Debian 6 (Squeeze). (Accessed: 25/04/2014).
| HOME | Next >> |